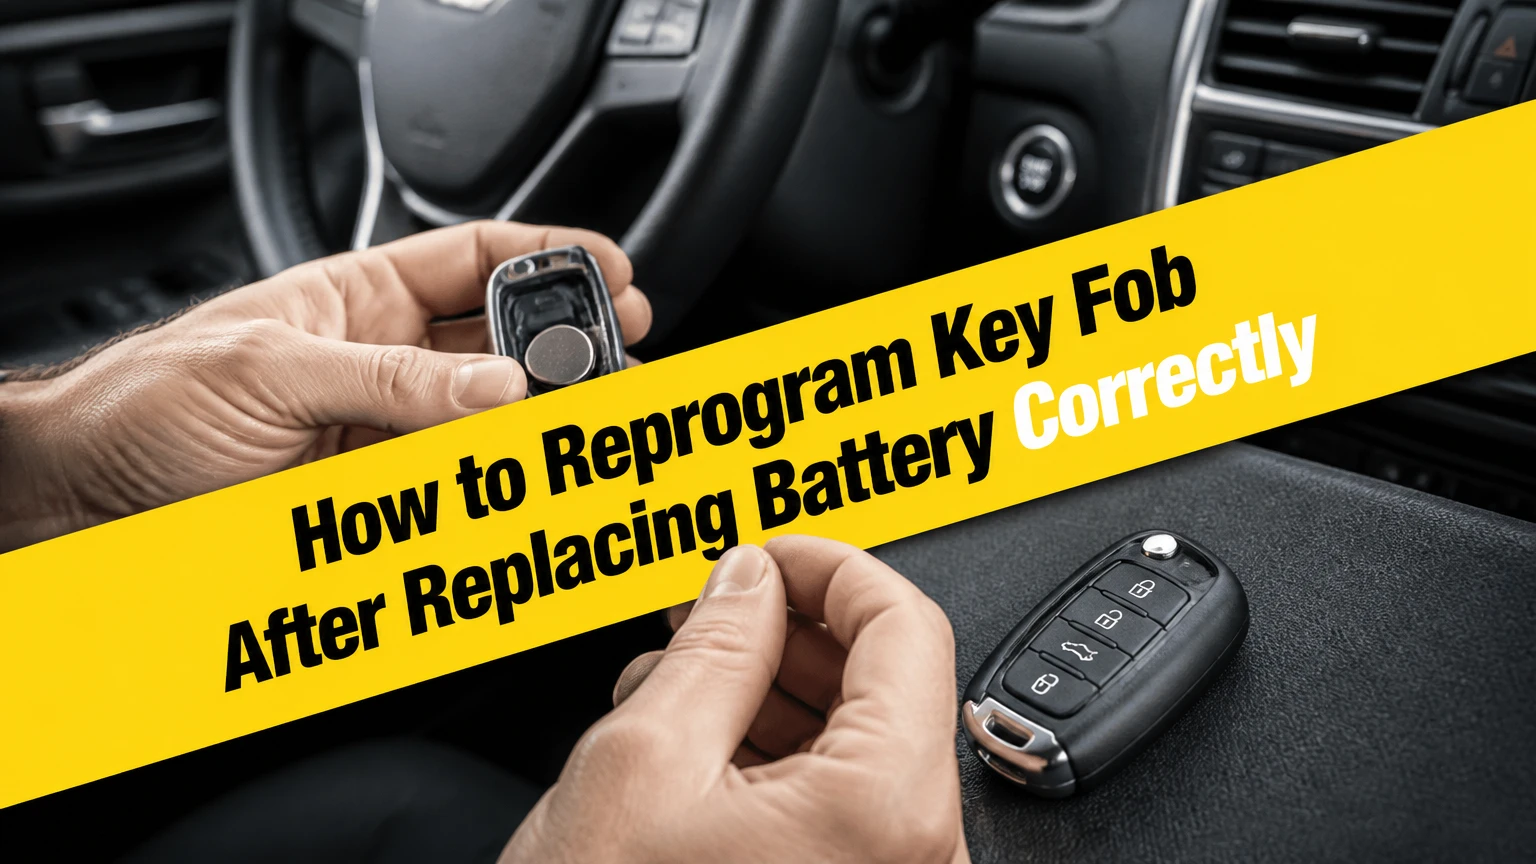
To reprogram a key fob after replacing its battery, first confirm the battery type and polarity, then use the exact synchronization or enrollment procedure for the vehicle’s year, make, and model. A normal battery replacement usually does not erase the fob’s stored code, so test the remote before attempting programming.
Key facts at a glance
A key fob battery powers the transmitter; it normally does not erase the fob’s programmed identity.
Remote-lock programming and engine-immobilizer key programming are separate functions.
A working remote button does not prove that a smart key can start the vehicle.
Ford, Honda, Nissan, Toyota, Lexus, General Motors, Volkswagen, BMW, and Mercedes-Benz use different procedures.
Typical DIY remote synchronization takes 5-10 minutes and costs $0 when the vehicle supports onboard programming.
A locksmith or dealer may be required for a replacement smart key, all-keys-lost situation, or security-locked vehicle.
Does a Key Fob Need Reprogramming After a Battery Change?
A key fob usually does not need reprogramming after a quick battery change. The fob’s nonvolatile memory stores its identity and security data independently of the coin-cell battery, while the battery supplies power only when a button is pressed or a proximity function operates.
The common belief that removing the battery for more than 30-60 seconds automatically destroys rolling-code synchronization is unreliable. Some vehicles require a button resynchronization after a completely discharged battery, but battery removal alone does not follow one universal timer or reset rule.
First, press Lock and Unlock while standing close to the vehicle. If the locks respond, programming was unnecessary. If the fob LED does not illuminate, the battery may be reversed, discharged, the wrong size, or poorly connected.
A rolling-code system also does not normally require the car and fob to remember an identical single number at every instant. The receiver accepts a controlled window of valid future codes, which allows occasional accidental button presses without immediately disabling the remote.
Remote programming versus key programming
Remote programming teaches the body control module to accept Lock, Unlock, Trunk, Panic, or remote-start commands. Immobilizer programming pairs a transponder chip with the engine-control or immobilizer system so the vehicle permits starting.
A mechanical key blade can unlock a door without starting the engine. A remote can lock doors without being authorized to start the vehicle. Smart keys may combine both functions, but the two electronic systems remain distinct.
What Should You Check Before Programming?
Before attempting a key-fob procedure, verify the battery, case, contacts, vehicle power, and remote compatibility. These checks take about three minutes and prevent many false programming diagnoses.
Before-you-start checklist
| Item | Typical specification | What to verify |
|---|---|---|
| Coin-cell battery | CR2032, CR2025, or CR2450 | Match the number printed on the old cell or fob |
| Battery voltage | About 3.0 V for a fresh 3 V cell | Measure with a multimeter under no load |
| Working distance | About 5-30 metres, vehicle dependent | Test beside the vehicle before testing remotely |
| Tools | Plastic pry tool, small screwdriver, multimeter | Avoid bending the circuit board or terminals |
| Vehicle state | Battery above 12.2 V at rest | Low vehicle voltage can disrupt onboard programming |
| Time required | 5-10 minutes for a manual procedure | Read the exact owner’s manual sequence first |
Install the coin cell with the positive and negative markings in the same orientation as the original. Coin cells can fit physically while being electrically reversed, and a reversed battery may make the fob appear completely dead.
Inspect the spring contacts for flattening, corrosion, or fingerprints. A contact that no longer presses firmly against the cell can produce intermittent operation, especially when the case flexes in a pocket.
Use the correct part number and chemistry. A CR2025 and CR2032 share a 20-millimetre diameter but differ in thickness, and a substitute that fits loosely can interrupt power when the button is pressed.
How to Reprogram Key Fob After Replacing Battery
Use the vehicle’s documented procedure, not a generic sequence copied from another model. The most common onboard methods are ignition cycling, lock cycling, a driver-door switch routine, or an infotainment-menu command, but the required timing and button combination vary by year and market.
Step 1: Identify the system and gather every remote
Find the exact vehicle year, make, model, trim, market, and key type. A 2012 Nissan Altima, 2012 Nissan Rogue, and 2012 Nissan Leaf may use different procedures despite sharing a brand and model year.
Gather every remote that must continue working. Some programming modes add one remote, while others erase previously stored remotes and rewrite the complete list. Keep the owner’s manual nearby and replace the batteries in all remotes before starting.
Close the doors unless the procedure specifically requires the driver door to remain open. Remove other keys, aftermarket alarm transmitters, and diagnostic accessories from the ignition area.
Checkpoint: You should know whether you are adding a remote, replacing the complete remote list, or merely resynchronizing an existing fob.
Common mistake: Starting a rewrite procedure with one remote missing. The absent remote may stop operating afterward.
Step 2: Enter the vehicle’s programming mode
Turn the ignition only to the position named by the manual. “On,” “Run,” and “Ignition II” generally power the vehicle systems without cranking the engine, but push-button vehicles may use a specific sequence involving the brake pedal.
Ford vehicles from several model families use an ignition-cycle method. A representative older Ford procedure turns the key from Off to Run eight times within approximately 10 seconds, ending in Run; the power locks then cycle to indicate programming mode. The exact cycle count is not universal across Ford years.
Many Honda and Acura vehicles use a repeated ignition and remote-button sequence. A common pattern turns the ignition to On, presses Lock, returns to Off, and repeats the cycle four times, with the locks cycling on the final cycle. Some models use fewer cycles or a different timing window.
Toyota and Lexus vehicles from selected years may use a driver-door and key-insertion routine. The sequence can distinguish add mode from rewrite mode, and one ignition transition may preserve existing remotes while another deletes them.
Checkpoint: A lock cycle, dashboard chime, security-light change, or menu confirmation should identify programming mode.
Common mistake: Counting a key position incorrectly. Do not count accessory as Run unless the model’s instructions specifically say so.
Step 3: Press the required fob buttons
Press the button specified by the procedure while programming mode is active, usually Lock or a Lock-and-Unlock combination. Hold the buttons for the stated interval, which may be 1-2 seconds, then release them without pressing unrelated buttons.
A representative Toyota-style remote routine may require pressing Lock and Unlock together for about 1.5 seconds, followed by one button for about one second. That sequence is not a universal Toyota procedure and should not be transferred to every Toyota or Lexus vehicle.
Program additional remotes during the same active window. The confirmation may be a second lock cycle, a chime, a flashing hazard lamp, or a message on the instrument display.
Checkpoint: The vehicle should provide a positive confirmation for each accepted remote.
Common mistake: Pressing the button before the vehicle enters programming mode. The fob may transmit normally, but the receiver will ignore it as an enrollment command.
Step 4: Exit programming mode and test every function
Turn the ignition off, remove the key, close the door, or select the menu command required to leave programming mode. Wait several seconds before testing so the body control module can store the result.
Test Lock, Unlock, trunk release, panic, and remote start if equipped. Test the fob from inside the vehicle, beside the vehicle, and at a normal distance, because a weak transmitter may work only at close range.
Test the mechanical blade and emergency key separately. On a push-button vehicle, test the starting backup method described in the manual, which may require holding the fob against a marked start location or placing it in a backup slot.
Checkpoint: Every previously working function should respond, and the vehicle should start only if the immobilizer pairing remains valid.
Common mistake: Assuming that door-lock operation proves start authorization. It does not.
Step 5: Confirm whether the result is programming or a hardware fault
If the fob still fails, repeat the battery and contact checks before repeating the programming sequence. A broken tactile switch, cracked solder joint, damaged antenna trace, water intrusion, or incompatible aftermarket transmitter cannot be repaired by reprogramming.
Compare the suspect fob with a second known-good fob. If the second remote works at normal range, the vehicle receiver is probably functional and the first fob needs repair or replacement.
If no remote works, check the vehicle battery, fuse supply, receiver, body control module, and aftermarket alarm system. A scan tool may reveal a stored receiver or antenna fault that a manual procedure cannot address.
Which Programming Method Fits Your Vehicle?
The correct method depends on the vehicle’s control architecture, not simply its brand. The table below describes common patterns, not guaranteed instructions for every model.
| Method | Common examples | Typical time | Confirmation signal | Main limitation |
|---|---|---|---|---|
| Ignition cycling | Older Ford, Lincoln, Mercury | 5-8 minutes | Door-lock cycle | Often unavailable on push-button models |
| Ignition and Lock cycling | Selected Honda, Acura, Nissan | 5-10 minutes | Lock cycle or chime | Exact cycle count varies by model |
| Door-switch routine | Selected Toyota, Lexus | 8-12 minutes | Lock cycle | A rewrite mode may delete absent remotes |
| Infotainment menu | Some Mazda, Hyundai, Kia, GM vehicles | 3-8 minutes | Screen message or chime | Menu may require an already authorized key |
| Scan-tool enrollment | Many smart keys and newer vehicles | 10-30 minutes | Tool status and vehicle response | Requires compatible software and security access |
A vehicle owner’s manual remains the primary authority because procedure availability changes by model year, body-control module, country, and factory option. Online instructions frequently combine steps from neighboring models.
Do aftermarket remotes use a different process?
Aftermarket remotes usually program through the alarm or remote-start control module rather than the factory body control module. Viper, Avital, Compustar, and Directed systems may require an under-dash valet button, ignition cycles, or a module-specific programming tool.
Identify the aftermarket system by locating the control module, antenna, LED, and valet switch. Factory key-fob instructions will not enroll an aftermarket transmitter unless the aftermarket system was designed to use the factory receiver.
What Is the Difference Between Fob Types?
Traditional remotes, integrated transponder keys, smart keys, and aftermarket transmitters differ in their radio functions, starting authorization, and programming requirements.
| Fob type | Typical vehicle feature | Starting authorization | Usual programming path |
|---|---|---|---|
| Separate remote | Physical ignition key | Mechanical key plus transponder, if fitted | Onboard remote routine may work |
| Integrated key | Blade and buttons in one shell | Internal transponder chip | Remote and immobilizer may require separate steps |
| Smart key | Passive entry and push-button start | Proximity authentication and immobilizer | Diagnostic tool often required for replacement |
| Aftermarket remote | Added alarm or remote start | Aftermarket module or factory key | Valet-button or module-specific routine |
Smart keys commonly use low-frequency vehicle antennas around 125 kHz for proximity detection and a higher-frequency radio link for remote communication. The exact implementation varies, so frequency cannot determine whether a replacement fob will work.
A replacement fob must match the vehicle’s part number, region, frequency, encryption generation, button layout, and immobilizer compatibility. A shell that looks identical may contain a different circuit board or an unprogrammable transponder.
Why Does the Fob Still Not Work After Programming?
A key fob that remains unresponsive after a successful-looking procedure usually has a power, compatibility, hardware, vehicle-receiver, or security problem. Programming cannot correct a reversed battery, damaged switch, wrong frequency, or failed body-control receiver.
| Symptom | Most likely cause | Test | Corrective action |
|---|---|---|---|
| No LED and no response | Reversed or flat battery | Measure cell and inspect polarity | Install the specified cell |
| LED works but locks do not | Wrong fob, lost enrollment, receiver fault | Test a known-good remote | Verify part number and program correctly |
| One button fails | Worn tactile switch or cracked solder | Compare button feel and continuity | Repair board or replace fob |
| Works beside car only | Weak battery, antenna damage, interference | Test with fresh cell at 1, 10, 20 metres | Repair fob or investigate receiver |
| Remote works, car will not start | Immobilizer not paired | Test emergency start method and security light | Perform transponder enrollment |
| All remotes fail | Vehicle power, fuse, receiver, BCM, aftermarket alarm | Scan module and inspect fuses | Diagnose vehicle electronics |
One counterintuitive fault is a damaged battery holder. The fob may pass a voltage check with the case open, yet lose contact when the cover is installed because the cell shifts away from a flattened terminal.
Another is accidental button activation. Repeated presses while the fob is out of range can advance the transmitter sequence beyond the receiver’s acceptance window on some systems. A model-specific resynchronization procedure may restore operation without full enrollment.
Do not pry terminals upward aggressively. Excessive force can break the soldered terminal from the circuit board, converting a simple contact problem into a board repair.
Can You Program a New Smart Key at Home?
Most owners cannot reliably program a new smart key at home without a compatible diagnostic tool and the vehicle’s security credentials. An existing remote that lost synchronization is different from an unregistered replacement smart key, which may require immobilizer enrollment.
Some vehicles provide an onboard spare-key procedure when two already-authorized keys are available. Other vehicles require a PIN, security gateway access, internet authorization, or an OEM-capable scan tool.
European vehicles from BMW, Mercedes-Benz, Audi, Volkswagen, and Jaguar Land Rover are not universally dealer-only, but many newer models use protected diagnostic access and encrypted key provisioning. An automotive locksmith with legitimate equipment may complete the work without a dealership.
The practical rule is simple: a battery change may be a DIY repair, while a replacement smart key is a security-programming job.
Should You Use a DIY Procedure, Locksmith, or Dealer?
Choose DIY when an existing fob stopped responding after the battery change and the owner’s manual provides an onboard routine. Choose a locksmith when a replacement key, smart key, lost key, or mobile service is involved; choose a dealer when the vehicle requires factory authorization or no qualified locksmith has the required equipment.
| Option | Typical price | Typical duration | Handles remote sync | Handles immobilizer enrollment |
|---|---|---|---|---|
| Owner’s manual procedure | $0 | 5-15 minutes | Often, model dependent | Rarely |
| Consumer scan tool | $40-$150 | 10-30 minutes | Sometimes | Only with supported models |
| Automotive locksmith | $80-$250 | 15-60 minutes | Yes | Often, equipment dependent |
| Dealership service department | $150-$400 | 1-3 hours | Yes | Yes, with OEM access |
Prices are typical United States ranges and vary with vehicle security level, travel charges, key cost, and whether all keys are lost. A locksmith may charge more for a mobile emergency visit but less overall than towing and dealer labor.
A cheap OBD device is not automatically a safe choice. Unsupported software can fail midway, drain the vehicle battery, or leave a security module in a locked state, particularly on vehicles with gateway authentication.
When should you stop trying DIY programming?
Stop after two careful attempts when the vehicle never provides a programming confirmation, when all remotes fail, or when the security indicator behaves abnormally. Stop immediately if the procedure warns that a rewrite mode will erase keys you cannot re-enroll.
Bring proof of ownership and the vehicle identification number to a locksmith or dealer. Legitimate providers may require registration documents, photo identification, or title information before cutting or programming a key.
How Do You Start a Car With a Dead Smart Key?
A dead smart-key battery does not necessarily prevent the vehicle from starting. Most manufacturers provide a passive backup method that lets the immobilizer read the transponder at close range.
Common backup methods include holding the smart key against the Start button, placing it in a marked console slot, inserting it into a steering-column receiver, or touching it to a designated backup area. The location is vehicle-specific and appears in the owner’s manual.
The mechanical emergency blade can unlock the driver door when the remote battery is dead, but it does not replace the electronic starting authorization. Replace the coin cell promptly after using the backup method.
Do not repeatedly press Start while moving the fob around the cabin. Follow the vehicle’s exact backup location because interior antennas are positioned for a particular reading zone.
How Much Does Key-Fob Programming Cost and Take?
Existing-fob synchronization typically costs $0 and takes 5-15 minutes when the vehicle supports an onboard procedure. Replacement-key programming typically costs $80-$400 and takes 15 minutes to three hours, depending on the key, security system, provider, and whether an appointment or diagnostic authorization is required.
The lowest-cost path is usually a manual procedure from the owner’s manual. The best value for a smart-key replacement is often a reputable automotive locksmith with documented compatibility, while a dealership becomes more practical when factory server access is mandatory.
Ask for an itemized quote covering the key, cutting, programming, travel, diagnostic fee, and tax. Confirm whether the quote programs the remote buttons only or includes immobilizer starting authorization.
Frequently Asked Questions
Will disconnecting the car battery reset the key fob?
Disconnecting the vehicle battery usually does not erase the key fob’s enrollment, but it can reset vehicle clock, window, radio, and body-control settings. A low vehicle battery can also interrupt programming. Restore stable vehicle voltage before attempting any synchronization procedure.
Can a locksmith program a key fob without the original?
A locksmith can often program a replacement fob without the original, provided the vehicle supports the locksmith’s equipment and ownership can be verified. Some systems require an existing authorized key, while others allow all-keys-lost enrollment through security credentials or manufacturer access.
Does a new key fob have to be the same brand?
A replacement fob does not always need the original retail brand, but it must be electronically compatible with the vehicle. Part number, frequency, encryption generation, button configuration, transponder type, and regional specification matter more than the logo on the shell.
Why does only one key-fob button work?
One working button usually indicates a worn switch, damaged solder joint, contaminated rubber membrane, or board trace failure rather than a programming problem. If Lock works but Unlock does not, inspect the faulty button or have the circuit board tested before reprogramming.
Can a key-fob battery be installed backward?
A coin-cell battery installed backward can prevent the transmitter from operating and may cause no LED response. Match the positive symbol on the battery to the marking inside the fob, then confirm firm spring contact and correct battery thickness.
The Bottom Line
The safest answer to how to reprogram key fob after replacing battery is to test the fob first, because a normal battery change usually preserves programming. If synchronization is genuinely required, use the exact year-specific procedure, gather every remote before entering rewrite mode, and distinguish remote-button enrollment from immobilizer key programming. DIY is appropriate for many existing-fob problems; replacement smart keys and persistent failures belong with a qualified automotive locksmith or dealer.