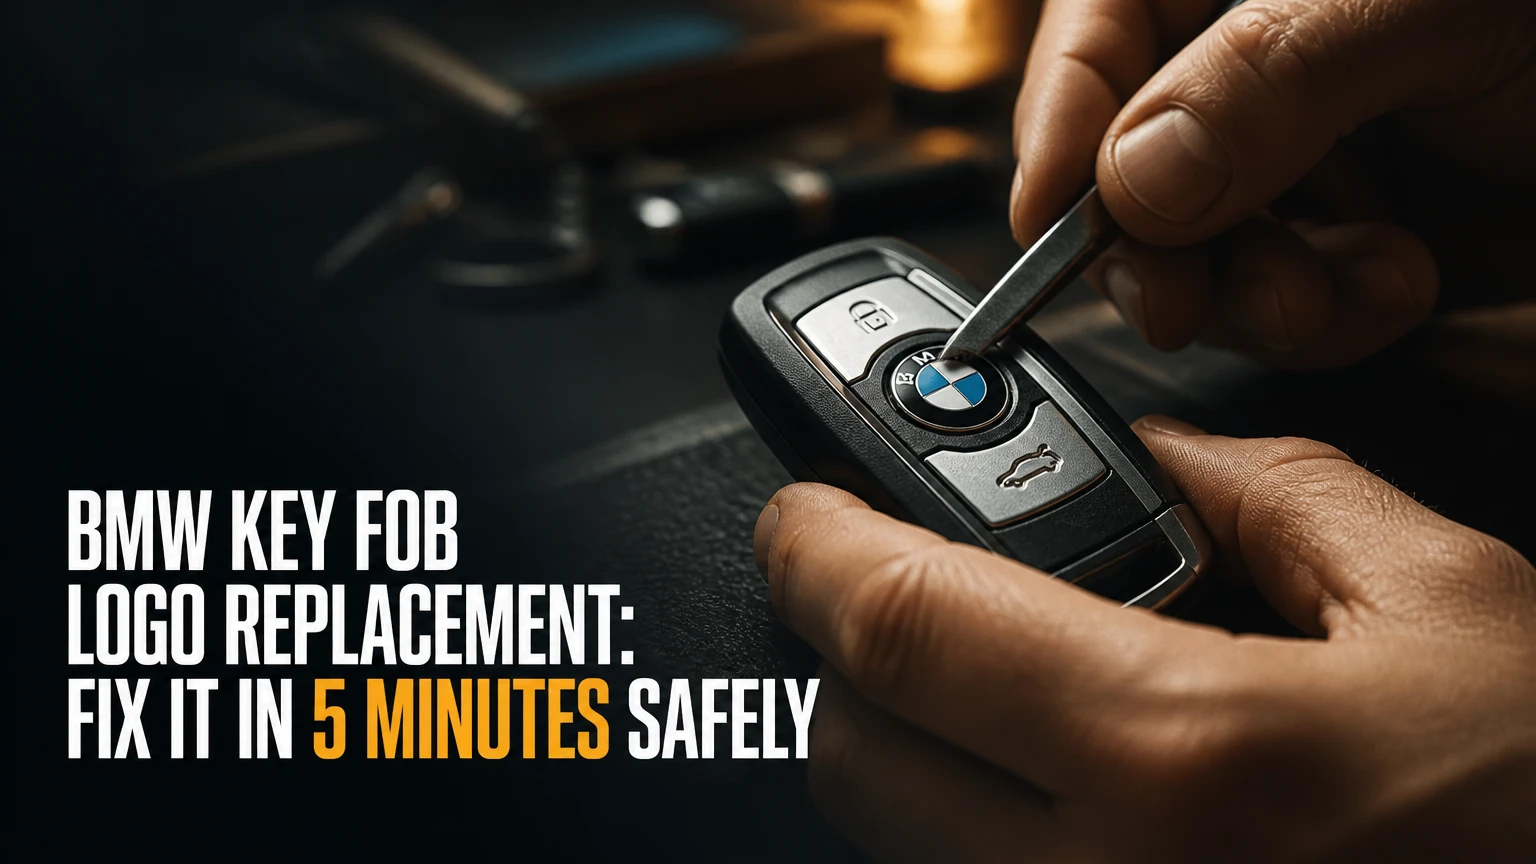
BMW key fob logo replacement usually requires only a correctly sized roundel, surface cleaning, tweezers, and two to five minutes of hands-on work. Many older BMW keys use an adhesive 11 mm sticker, while several F-Series and G-Series keys use a rigid emblem that also functions as the lock button. The correct part depends on the key shell, not only the vehicle model.
Key Facts at a Glance
- The common BMW key fob roundel size is 11 mm, but Display Keys and aftermarket shells may use different diameters.
- BMW part number 66122155753 is commonly sold as an 11 mm key emblem or sticker, while 66122155754 commonly refers to an emblem with a backing structure.
- A decorative sticker can be installed without glue; a functional-button emblem needs controlled adhesive placement.
- Typical DIY parts cost $5-$15 USD, while Bangladesh marketplace pricing commonly falls around 300-900 BDT before delivery.
- Hands-on installation usually takes 2-5 minutes, but E6000 adhesive may need approximately 24 hours to cure.
- Runny cyanoacrylate super glue can enter the switch gap and permanently restrict a modern BMW lock button.
What Does BMW Key Fob Logo Replacement Involve?
BMW key fob logo replacement means changing the small blue-and-white BMW roundel on the remote casing, rather than replacing the remote electronics or programming a new key. The repair may involve a thin self-adhesive badge, a thicker metal emblem, or a complete replacement shell when the plastic actuator underneath is damaged.
The visible roundel has two different jobs across BMW key generations. On older diamond and rectangular remotes, the badge is generally decorative. On many later trapezoid-shaped remotes, the roundel is mounted over the lock switch and transfers finger pressure to the electronic button.
A logo that is faded, scratched, or lifting usually needs only a surface replacement. A missing logo requires closer inspection because the exposed circular area may be a button actuator, a recess in the shell, or evidence of a broken housing.
BMW parts catalogs and specialist retailers commonly associate 66122155753 with an 11 mm key emblem, while 66122155754 is often listed with an attached backing or button structure. Catalog descriptions can vary by market and production date, so the part number should be checked against the key casing and VIN before ordering.
How Do You Identify the Correct BMW Roundel?
The correct BMW roundel is identified by measuring the recess and determining whether pressing the logo produces a mechanical click. Vehicle year alone is insufficient because BMW used overlapping key designs, replacement shells, regional variations, and different remote systems during the same production period.
Remove the key from the pocket and inspect the remote in bright light. Measure the circular recess across its widest point with a ruler or digital caliper, then measure the replacement emblem’s outside diameter and backing thickness. An 11 mm part should fit the recess without forcing the surrounding plastic outward.
Key styles and likely replacement types
| Key style | Common BMW period | Logo function | Typical replacement |
|---|---|---|---|
| Diamond or rubber-head remote | 1999-2006 | Decorative badge | 11 mm adhesive sticker |
| Rectangular slot-key remote | 2006-2013 | Decorative badge | 11 mm adhesive sticker |
| Trapezoid or modern-blade remote | 2012-present | Lock-button actuator | Backed emblem or button cap |
| Display Key remote | 2016-present | Decorative, model-specific | Measured badge or shell component |
These dates are practical identification ranges, not universal fitment rules. For example, an E90 produced near a transition period can have a different remote casing from another E90 in a different market, and an aftermarket shell may not reproduce the original recess dimensions.
The click test is decisive. If the logo moves downward and springs back with a crisp click, treat the replacement as a functional button. If the logo is flush, immobile, and mounted in a shallow decorative recess, an adhesive sticker is normally appropriate.
Is the BMW Logo Decorative or a Functional Button?
The BMW logo is a functional lock button when pressing the roundel activates a distinct switch movement and the key’s lock function responds. The BMW logo is decorative when it is bonded to a fixed recess and pressing it does not operate a separate button.
This distinction determines the repair method. A sticker belongs on a stable surface that already has its own button arrangement. A backed emblem belongs over the actuator, with adhesive restricted to the emblem’s center or designated bonding area.
Do not test by repeatedly forcing a missing emblem. Press the exposed plastic actuator once with a clean fingertip and compare its travel with the other remote buttons. A mushy, sunken, or permanently depressed actuator indicates shell or switch damage, not a missing badge alone.
Comparison of replacement options
| Replacement option | Typical size or part | Typical cost | Installation risk |
|---|---|---|---|
| Adhesive aluminum sticker | 11 mm, often 66122155753 | $5-$8, 300-500 BDT | Low if the surface is intact |
| Epoxy dome sticker | 10-11 mm aftermarket | $3-$7, 250-600 BDT | Low, but thickness can vary |
| Rigid metal emblem | 11 mm, often 66122155754 | $10-$15, 700-1,200 BDT | Medium because glue can reach switch |
| Replacement key shell | Model-specific casing | $15-$40, 1,500-4,000 BDT | Medium to high because transfer work is required |
The cheapest sticker is usually the right choice for a faded badge that remains attached. A rigid emblem is preferable when the original functional button cap is missing and the actuator still clicks correctly.
A replacement shell is not an upgrade for every worn logo. Shell replacement becomes more sensible when the recess is cracked, the button actuator has broken, the case seam will not close, or water has reached the electronics.
Which Replacement Type Should You Buy?
Buy an adhesive 11 mm sticker for an intact older BMW key with a damaged surface badge. Buy a backed emblem for a modern BMW remote when the roundel transfers pressure to the lock switch. Buy a replacement shell when the plastic button support or casing is structurally damaged.
Choose an adhesive sticker when
- The original badge is still present but faded or scratched.
- The surface underneath is flat and free from deep gouges.
- Pressing the logo does not operate the lock switch.
- You want a no-glue repair with minimal risk.
- The replacement listing specifies an outside diameter close to the measured recess.
Thin aluminum stickers are inexpensive and easy to align. Epoxy domes look deeper but can sit higher than the original badge, which may cause pocket abrasion or interference with a nearby button.
Choose a backed emblem when
- The logo is missing from an F-Series or G-Series remote.
- The circular actuator beneath the badge still clicks.
- The replacement has the correct rear support and diameter.
- The product description identifies the emblem as a button cap rather than a flat decal.
The rear profile matters as much as the front diameter. A visually correct 11 mm badge with an excessively tall backing can bind against the shell, while a flat sticker may fail to transfer pressure to the switch.
What Tools and Materials Are Needed?
A sticker repair needs one alcohol wipe, a plastic pick or wooden toothpick, tweezers, and the replacement badge. A functional-button repair additionally needs a toothpick or fine applicator and a very small amount of flexible gel adhesive.
Before you start
| Requirement | Sticker repair | Backed emblem repair |
|---|---|---|
| Hands-on time | 2-5 minutes | 5-10 minutes |
| Functional cure time | Immediate after pressing | 1 hour minimum, 24 hours for E6000 |
| Typical part cost | $3-$8 | $10-$15 |
| Cleaning material | 70-90% isopropyl alcohol | 70-90% isopropyl alcohol |
| Application tool | Tweezers | Tweezers and toothpick |
| Main prerequisite | Flat, intact recess | Working actuator and correct backing |
Use isopropyl alcohol on a cloth or cotton swab rather than flooding the key. Liquid entering the seam can damage the remote, particularly on keys with worn case joints or missing seals.
Cyanoacrylate gel can work in a controlled repair, but liquid super glue is a poor choice because capillary action can pull it beneath the button. E6000 gives more repositioning time and remains flexible, although the part should remain undisturbed for about 24 hours.
How Do You Replace an Older BMW Key Fob Sticker?
Replace an older BMW key fob sticker by removing the damaged badge, cleaning the recess, aligning the new 11 mm roundel, and applying pressure for approximately 30 seconds. The surface must be dry and free of wax, skin oil, and loose adhesive before the new sticker is installed.
Step 1: Remove the old badge
Lift a peeling badge with a plastic pick or wooden toothpick. Work around the edge instead of inserting a metal screwdriver, which can gouge the plastic recess or scratch the painted casing.
If the old badge is firmly bonded, warm the key casing mildly with hand heat for one to two minutes. Do not use a heat gun, hair dryer on high heat, or open flame because remote housings and button membranes can deform.
Success checkpoint: The recess has no loose flakes or raised adhesive ridges.
Common mistake: Leaving the original sticker’s glossy film under the replacement.
Step 2: Clean and dry the recess
Dampen an alcohol wipe or cotton swab with isopropyl alcohol and clean the circular recess. Remove adhesive residue with repeated light passes rather than soaking the casing.
Allow the area to air-dry for at least 60 seconds. Do not apply Goo Gone, acetone, or oily citrus solvent unless the casing material has been tested, because those products can soften printed surfaces and leave a bonding film.
Success checkpoint: A clean finger placed near, not on, the recess detects no greasy residue.
Common mistake: Touching the cleaned surface before alignment.
Step 3: Align the new roundel
Hold the replacement with tweezers and check its diameter before removing the backing. Orient the BMW roundel consistently, usually with the “B” at the 12 o’clock position, although exact logo orientation is cosmetic rather than functional.
Lower one edge into the recess first, then roll the badge into place. This method reduces trapped air and makes centering easier than dropping the badge from above.
Success checkpoint: The emblem sits evenly inside the recess with no raised edge.
Common mistake: Pressing before checking whether the badge is centered.
Step 4: Set the adhesive
Press the center and then the perimeter with a clean fingertip for approximately 30 seconds. Leave the key at room temperature for 10-15 minutes before putting it into a tight pocket or key ring.
Pressure activates the pressure-sensitive adhesive; additional liquid glue is unnecessary for a correctly prepared sticker. If the sticker still feels loose after 15 minutes, remove it and diagnose contamination or incorrect size instead of flooding the edge with glue.
Success checkpoint: No edge lifts when lightly touched with a fingernail.
Common mistake: Adding super glue to a self-adhesive badge.
How Do You Replace a Missing Modern BMW Button Emblem?
Replace a missing modern BMW button emblem by confirming the exposed actuator works, cleaning only the bonding surfaces, applying one microscopic central adhesive dot, and keeping glue away from the button perimeter. The repair is successful only when the emblem remains secure and the lock button retains its crisp travel.
Step 1: Confirm the actuator
Press the exposed circular actuator once. Confirm that the lock function responds and that the button returns immediately to its original height.
Do not continue with an emblem-only repair if the actuator does not click, the remote locks continuously, or the plastic support is cracked. Those symptoms indicate a switch or shell problem.
Success checkpoint: The lock command works and the actuator springs back.
Common mistake: Gluing a cap over a broken or depressed switch.
Step 2: Clean the bonding area
Use a barely damp alcohol swab to clean the back of the emblem and the surrounding plastic contact area. Keep the swab away from the electronic switch opening and allow both surfaces to dry fully.
Avoid sanding the actuator itself. Lightly roughening a flat metal bonding surface can help some adhesives, but sanding the key casing can remove its protective coating and create a larger contamination path.
Success checkpoint: Both bonding surfaces are dry, matte-free, and free of lint.
Common mistake: Cleaning with acetone, which can attack ABS plastic and printed coatings.
Step 3: Apply a micro-dot of adhesive
Place one tiny gel adhesive dot on the center of the emblem’s rear, approximately 0.5-1 mm wide. For E6000, use the smallest amount that remains within the central backing area and does not approach the edge.
The adhesive must bond the emblem without becoming a structural plug around the actuator. More adhesive does not compensate for a wrong-size emblem or a dirty surface.
Success checkpoint: Glue remains entirely within the emblem’s backing footprint.
Common mistake: Applying a continuous ring, which can squeeze into the switch gap.
Step 4: Seat and test the emblem
Lower the emblem straight into the recess with tweezers. Apply light, even pressure for 20-30 seconds, then release and test the button with a fingertip.
A crisp click indicates that the actuator still has free movement. A soft or sticky feel means the emblem is misaligned or adhesive has migrated, so stop pressing and remove the cap before the adhesive cures.
Success checkpoint: Lock activation and button travel match the other remote controls.
Common mistake: Testing with repeated hard presses while the glue is still liquid.
Step 5: Allow the bond to cure
Keep the key flat and undisturbed for at least one hour with gel cyanoacrylate. Allow approximately 24 hours for E6000 before placing the key in a pocket, attaching it to a metal key ring, or exposing it to rain.
Cure time is separate from hands-on time. A five-minute installation can still require an overnight wait.
Success checkpoint: The emblem does not shift under gentle side pressure after curing.
Common mistake: Returning the key to daily use immediately.
What Adhesive Is Safest for a BMW Key Button?
A controlled gel adhesive or flexible contact adhesive is safer than runny super glue for a BMW key button, but no adhesive is safe when applied near the actuator gap. Gel cyanoacrylate cures quickly, while E6000 allows repositioning and tolerates minor flexing at the cost of a longer cure period.
| Adhesive | Working time | Typical cure guidance | BMW key risk |
|---|---|---|---|
| Liquid cyanoacrylate | 5-20 seconds | 10-30 minutes | Very high seepage risk |
| Gel cyanoacrylate | 30-90 seconds | 1 hour minimum | Moderate if overapplied |
| E6000 | 5-10 minutes | 24 hours | Lower seepage, longer handling time |
| Double-sided badge tape | Immediate | 10-30 minutes under pressure | Low, but poor for button caps |
The best practitioner rule is simple: use the least adhesive that can hold the emblem. A functional cap needs a bond at its center or designed rear pads, not a sealed perimeter.
BMW key cases often use ABS or similar molded plastic, and solvent compatibility varies between shells. Acetone is not a general-purpose rescue treatment. It can craze plastic, remove printed graphics, and spread dissolved adhesive deeper into the casing.
How Much Does BMW Key Fob Logo Replacement Cost?
BMW key fob logo replacement typically costs $3-$15 for a DIY badge and $15-$40 for a replacement shell, with local installation adding approximately 300-1,000 BDT or $5-$15. Genuine BMW parts usually cost more than generic badges, but part accuracy and backing geometry reduce fitment risk.
| Repair route | Parts cost | Labor time | Typical total |
|---|---|---|---|
| Generic 11 mm sticker | $3-$7 | 2-5 minutes | $3-$7 |
| Genuine-style adhesive emblem | $5-$10 | 2-5 minutes | $5-$10 |
| Genuine backed button emblem | $10-$15 | 5-10 minutes | $10-$15 |
| Shell replacement by a technician | $15-$40 | 30-60 minutes | $30-$80 |
Bangladesh buyers may find 11 mm BMW key stickers on Daraz or at Dhaka automotive accessory markets, commonly in two-packs or ten-packs. Marketplace stock, shipping, seller authenticity, and installation charges vary, so inspect the stated diameter and rear profile instead of relying on a vehicle model name alone.
A low-priced ten-pack can be economical for workshop use but may contain thin badges with weak adhesive. For one personal key, a single correctly measured emblem with a return option is often the lower-risk purchase.
What Are the Common Failure Modes?
Most failed BMW key emblem repairs result from incorrect diameter, contaminated plastic, excessive glue, or a damaged actuator. Each failure has a different remedy, and forcing the button usually increases the repair cost.
The sticker keeps falling off
A falling sticker usually indicates oil, wax, old adhesive, a concave surface, or an undersized badge. Remove it, clean with isopropyl alcohol, let the recess dry, and install a new badge without adding liquid glue.
Do not roughen painted plastic aggressively. A clean, correctly sized replacement normally bonds better than a heavily scratched surface.
The modern button feels mushy
A mushy button usually means adhesive has reached the switch gap or the emblem is pressing off-center. If the adhesive is still soft, lift the emblem with a plastic pick and clean the area with a controlled alcohol swab.
Do not pour acetone around the button. Once cyanoacrylate has fully cured inside a switch, replacing the key shell or switch assembly may be more reliable than attempting chemical removal.
The emblem sits too high
A high emblem usually has the wrong backing thickness or is sitting on old adhesive. Remove the badge, measure the recess depth, and compare the replacement’s rear profile with the original.
A badge that looks correct in a product photograph can still interfere with pocket use or neighboring buttons when its backing is too tall.
The lock button works intermittently
Intermittent operation can indicate a misaligned cap, a cracked actuator, a worn tactile switch, or remote electronics damage. Remove the emblem and test the exposed actuator before ordering another badge.
A logo cannot repair a failing microswitch. If the exposed switch also behaves intermittently, seek a key technician or replace the shell and transfer the electronics as appropriate.
The key has water damage
A wet remote should not receive a new emblem before the electronics are inspected. Remove the battery if the design permits, dry the casing and circuit board safely, and address corrosion before cosmetic repair.
A new roundel will not restore a damaged immobilizer, radio transmitter, or battery contact.
When Should You Replace the Entire Key Shell?
Replace the entire BMW key shell when the roundel recess is cracked, the functional button support is broken, the casing no longer closes, or the remote’s rubber membrane has deteriorated. A logo-only repair is appropriate only when the underlying plastic and switch still operate normally.
Shell replacement requires transferring compatible electronics, battery contacts, emergency-key components, and sometimes a transponder. Not every aftermarket shell preserves the original charging coil, comfort-access antenna position, or Display Key function.
A replacement shell also does not automatically program a BMW vehicle. Programming requirements depend on the key type and vehicle system, while immobilizer components can make an apparently simple casing swap unsuitable for inexperienced owners.
How Does a Display Key Change the Repair?
A BMW Display Key requires model-specific measurement and construction checks because its touchscreen housing does not use the same simple badge recess as many conventional remotes. Do not pry at a Display Key logo until you confirm that the visible mark is a removable badge rather than an integrated case component.
Display Keys can contain a screen, rechargeable battery, charging hardware, and sealed housing. Excessive heat, solvent, or force can damage those components even when the cosmetic emblem is small.
For a Display Key, compare the old component with the supplier’s exact dimensions, request a return option, and use a specialist if the logo is integrated into the rear shell. An 11 mm badge should never be assumed to fit solely because it fits another BMW remote.
Where Can You Buy a Replacement in Bangladesh?
Bangladesh buyers can search Daraz for “BMW key emblem 11 mm,” check BMW parts specialists, or ask accessory shops in Dhaka New Market and other automotive markets for a measured roundel. Confirm diameter, backing type, adhesive status, and return terms before paying.
Typical Bangladesh pricing varies by material and authenticity. Generic stickers may fall near 300-500 BDT, backed emblems near 700-1,200 BDT, and shop-installed repairs may exceed 1,000 BDT when the technician supplies the part.
Ask the seller four specific questions:
- Is the stated diameter 10 mm, 11 mm, or another size?
- Is the item flat adhesive film or a rigid button emblem?
- Does the rear backing match a functional lock-button key?
- Are the BMW part number and return policy documented?
A product title mentioning “E90,” “F30,” or “X5” is not proof of fitment. Key casing geometry determines fit.
BMW Key Fob Logo Replacement FAQ
Does every BMW key use an 11 mm logo?
No. Many conventional BMW remotes use an 11 mm roundel, but Display Keys, aftermarket shells, and unusual regional housings may differ. Measure the recess and compare both the emblem diameter and backing thickness before ordering. A one-millimeter mismatch can create a visible gap or interfere with button travel.
Can I replace the BMW key logo without opening the key?
Yes, most decorative stickers and modern button caps can be replaced without opening the remote. Opening becomes relevant when the shell is cracked, the actuator is broken, water has entered the case, or the electronics must be transferred to a replacement housing.
Does replacing the logo affect BMW key programming?
No, replacing a decorative badge or button cap does not change key programming. Programming and immobilizer functions reside in the remote electronics and vehicle security system. A replacement shell may require careful transfer of those components, but the cosmetic emblem itself has no coding function.
Can I use double-sided tape instead of glue?
Double-sided badge tape can work for a flat decorative sticker if it is thin, automotive-grade, and cut to the correct shape. It is less suitable for a modern functional button cap because excessive tape thickness can reduce actuator travel. Never use a thick foam tape inside a shallow button recess.
Why is my BMW logo turning cloudy after replacement?
Cloudiness can come from cyanoacrylate vapor, solvent exposure, poor-quality clear coating, or moisture trapped beneath the badge. Liquid super glue is especially likely to create haze near transparent or glossy surfaces. Remove contamination carefully and use a compatible gel or flexible adhesive on the next installation.
Is a genuine BMW emblem worth the extra cost?
A genuine BMW emblem is worth the extra cost when the key has a functional button, the rear backing must match a precise actuator, or appearance and durability matter. A generic 11 mm sticker is usually sufficient for a flat decorative recess, provided its adhesive and dimensions are accurate.
The Bottom Line
BMW key fob logo replacement is a small repair with two distinct procedures. Use a clean, self-adhesive 11 mm sticker for an intact decorative recess, or use a correctly backed emblem with a microscopic central adhesive dot when the logo operates the lock button. Confirm the diameter, test the actuator, keep solvents and runny glue away from the casing, and replace the shell when the plastic support is damaged. Done correctly, BMW key fob logo replacement costs about $5-$15 and restores the key without programming or electronic repair.