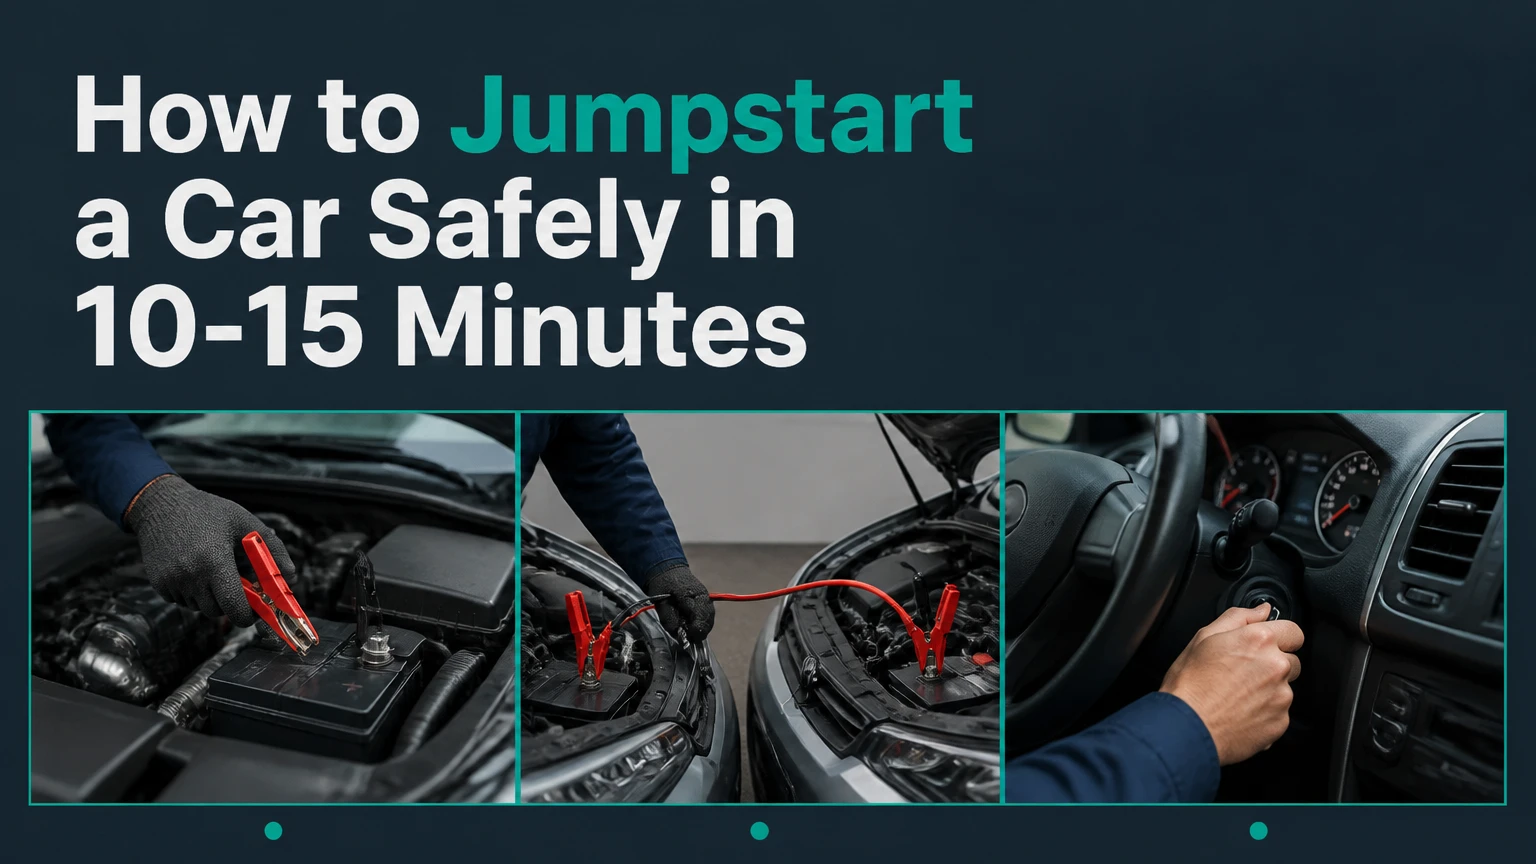
To jumpstart a car, connect a suitable 12-volt power source with the ignition off, attach the red positive cable first, connect the final black clamp to unpainted metal on the disabled vehicle, then start the donor and disabled cars in sequence. The process usually takes 10-15 minutes, but damaged batteries require roadside assistance.
Key Facts at a Glance
- A conventional car jump-start uses a 12-volt donor battery or 12-volt portable booster.
- The red positive cable connects to both positive terminals before the negative-side connection is made.
- The final black clamp normally connects to an unpainted engine or chassis ground on the disabled car.
- A cracked, leaking, swollen, or frozen battery must not be jump-started.
- A running engine after a jump does not prove that the battery or alternator is healthy.
- A 20-30 minute drive may provide temporary recovery, but a battery charger and electrical-system test are more reliable.
What a Jump-Start Does
A jump-start temporarily supplies electrical current to a vehicle whose 12-volt battery cannot deliver enough power to operate the starter motor. The external battery supports the starting event, while the disabled vehicle’s alternator supplies electricity after the engine runs.
A typical healthy lead-acid battery measures about 12.6 volts at rest when fully charged. Voltage can fall near 12.0 volts when heavily discharged, although surface charge, temperature, battery age, and meter accuracy affect the reading. Cold weather reduces available cranking power while increasing the engine’s mechanical resistance, which explains why marginal batteries often fail during winter.
The jumper cables create a temporary parallel connection between two 12-volt electrical systems. Current travels through the cables to support the starter, not because the donor battery instantly “fills” the disabled battery. The starter may draw hundreds of amps for several seconds.
The alternator is designed primarily to maintain system voltage and replenish normal energy use. It is not a substitute for a controlled battery charger, especially after a deep discharge. AAA recommends checking the owner’s manual before connecting cables because manufacturers may specify different grounding points or procedures.
Before You Start
A safe jump-start requires two compatible 12-volt systems, insulated jumper cables or a charged booster pack, and enough physical access to keep the clamps separated. The most important prerequisite is a battery inspection, because external power can worsen damage that is already visible.
| Requirement | Typical specification | Why it matters |
|---|---|---|
| Electrical system | 12 volts, negative ground | Prevents incompatible voltage or polarity connections |
| Jumper cable length | 10-20 feet | Reaches batteries in opposing parking positions |
| Cable thickness | 2-4 gauge for trucks, 4-8 gauge for cars | Reduces voltage loss during cranking |
| Setup time | 3-5 minutes | Covers positioning and terminal inspection |
| Starting attempts | 3-4 attempts, 5 seconds each | Limits starter and cable heating |
| Protective equipment | Safety glasses, gloves, no loose clothing | Reduces exposure to sparks and acid |
Do not proceed if the battery case is cracked, leaking, badly swollen, smoking, unusually hot, or covered with active frost. Battery odor resembling rotten eggs can indicate excessive charging or internal damage. Move away from the vehicle and call roadside assistance if smoke, fire, or a strong chemical smell appears.
Read both vehicle manuals when available. Some vehicles use remote positive and negative jump posts, battery monitoring sensors, or a ground point specifically intended for jump-starting. On many newer cars, connecting to the wrong terminal can damage a battery sensor or trigger electronic faults.
Park the vehicles close enough for the cables to reach, but do not let the vehicles touch. Select Park for automatic transmissions or Neutral for manual transmissions, apply both parking brakes, switch off the ignitions, and turn off lights, climate control, audio systems, and heated accessories.
How Do You Jump-Start a Car With Cables?
To jump-start a car with cables, make four connections in the correct order, start the donor vehicle, attempt the disabled vehicle for no more than five seconds, then remove the clamps in reverse order. The final negative connection should be away from the disabled battery unless the vehicle manual specifies a different terminal.
The procedure below assumes two conventional 12-volt vehicles with negative-ground systems. Use the manufacturer’s designated posts when they differ from the generic arrangement.
Steps 1-2: Position and Prepare the Vehicles
- Park the donor vehicle close enough for the cables to reach both batteries without stretching across fans, belts, or hot exhaust components.
- Keep the vehicles from touching each other.
- Switch off both ignitions and remove the keys or keep key fobs several feet away from push-button ignition systems.
- Set both parking brakes and place the transmissions in Park or Neutral.
- Open the hoods and locate the positive and negative terminals or marked remote posts.
- Check that both batteries have the same nominal voltage, normally 12 volts.
You will know the setup is correct when both vehicles are stable, powered off, and positioned so the cables can lie loose rather than under tension. A common mistake is placing the donor vehicle nose-to-nose with the disabled vehicle while leaving too little room to open the hoods.
Steps 3-6: Connect the Cables in Order
Connect the cables in this sequence:
- Attach one red clamp to the positive terminal of the disabled battery.
- Attach the other red clamp to the positive terminal of the donor battery.
- Attach one black clamp to the negative terminal of the donor battery.
- Attach the remaining black clamp to a clean, unpainted metal ground on the disabled vehicle’s engine block or chassis.
Use a substantial metal bracket or engine lifting point, not a thin painted panel, fuel line, moving component, or nearby sensor. The final ground connection can produce a small spark, so placing it away from the battery reduces the chance of igniting hydrogen gas released during charging.
The connection is successful when every clamp grips firmly, the red cable reaches only positive terminals, and the black cable reaches only negative or ground points. Never allow the red and black clamps to touch once either cable is connected to a live battery.
Some vehicles require the final black clamp to connect to a marked negative post. That instruction overrides the generic ground recommendation. The owner’s manual is authoritative for vehicles with battery-current sensors, auxiliary batteries, or unusual charging layouts.
Steps 7-9: Transfer Power and Start the Car
Start the donor vehicle and let it idle for approximately 2-5 minutes. Do not assume that revving the engine to 2,000 revolutions per minute is necessary; modern charging systems may regulate output, and aggressive throttle use adds risk without guaranteeing faster recovery.
After the short waiting period, attempt to start the disabled vehicle. Crank for no more than five seconds, then stop and wait at least 60 seconds before trying again. Keep the donor vehicle running during the attempt.
You will know the jump has worked when the disabled engine starts and continues running without the starter motor engaged. A frequent mistake is holding the key or start button too long, which overheats the starter and cables while providing little benefit.
If the disabled vehicle starts slowly, keep both engines running for several minutes before disconnecting. If the donor engine stalls as soon as the cables are connected, switch both ignitions off and disconnect the cables because the disabled vehicle may have a short circuit, severe battery failure, or reversed connection.
Step 10: Remove the Cables in Reverse Order
Remove the clamps in this order:
- Black clamp from the disabled vehicle’s engine ground.
- Black clamp from the donor battery’s negative terminal.
- Red clamp from the donor battery’s positive terminal.
- Red clamp from the disabled battery’s positive terminal.
Keep each removed clamp away from terminals, bodywork, moving belts, and the other clamps. Reverse removal reduces the chance that a live positive clamp contacts the vehicle body while the negative connection remains in place.
You will know the disconnection is safe when all four clamps are isolated and neither engine has stalled. Do not allow the cable ends to dangle against the radiator fan or accessory belt.
Step 11: Keep the Vehicle Running
Leave the restarted vehicle running and drive directly to a safe destination or repair facility. A continuous 20-30 minute drive can replace some consumed energy, but it may not fully charge a deeply discharged battery.
Avoid turning the engine off in a remote location immediately after the jump. If the battery has an internal fault, the car may not restart. A battery charger is safer and more effective than relying on a long drive to restore full charge.
How Do You Use a Portable Jump Starter?
A portable jump starter connects directly to the disabled vehicle’s battery and supplies short-duration starting current without a donor vehicle. Most packs require a charged internal battery, correct polarity, and a connection to the manufacturer’s specified positive and negative points.
| Portable booster feature | Typical car value | Larger vehicle value |
|---|---|---|
| Peak current rating | 600-1,000 amps | 1,000-2,000 amps |
| Engine compatibility | 4-cylinder gasoline | V6, V8, or diesel subject to manual |
| Recharge interval | Every 3-6 months | Every 3-6 months |
| Operating temperature | About 32-104°F | Model-specific, often -4-140°F storage |
| Typical price | $60-$120 | $120-$250 |
| USB output | 5 volts, 2-3 amps | 5 volts, 2-3 amps |
Turn off the pack, connect its red clamp to positive and black clamp to the designated negative ground, then switch the pack on if its instructions require that step. Start the vehicle within the product’s stated window, normally after waiting 30-60 seconds for the vehicle electronics to wake.
Do not use a portable pack with damaged cables, a swollen internal battery, or a rating below the vehicle manufacturer’s requirement. Lithium packs lose usable output in severe cold, so keep the device inside the passenger compartment rather than storing it permanently in a freezing trunk.
Which Equipment Works Best?
Jumper cables cost less and remain usable indefinitely if their insulation and clamps stay intact, while a lithium booster offers independence when another vehicle cannot reach the battery. Roadside assistance is the safest choice when the battery is damaged, the vehicle is unfamiliar, or traffic makes roadside work hazardous.
| Method | Typical cost | Main specification | Best situation |
|---|---|---|---|
| 8-gauge jumper cables | $20-$40 | 10-16 feet, 12-volt | Compact gasoline car |
| 4-gauge jumper cables | $35-$80 | 16-20 feet, high-current | SUV, truck, cold weather |
| Lithium jump starter | $60-$250 | 600-2,000 peak amps | Garage, city parking, solo driver |
| Roadside assistance | $0-$150 per call | Professional service | Unsafe location or uncertain fault |
| Battery charger | $30-$150 | 2-10 amp controlled charge | Deep discharge and overnight recovery |
A high peak-amp number alone does not guarantee performance. Cable quality, clamp contact, battery temperature, battery state, and the manufacturer’s continuous-current rating affect the actual starting result.
A practitioner rule is to buy the longest practical copper cable that fits the vehicle, because short, thin cables become difficult to position and lose more voltage under starter load. A second rule is to test a booster pack every three months, since an unused lithium pack can discharge while sitting in a glove box.
How Much Does a Jump-Start Cost?
A basic jump-start costs $20-$80 when the vehicle owner already has cables, $60-$250 for a portable booster, or approximately $50-$150 for a one-time roadside call in many United States markets. Battery replacement, charging, and diagnosis cost extra.
| Service or repair | Typical price | Typical time | What the price excludes |
|---|---|---|---|
| DIY cable jump | $0 after equipment | 10-15 minutes | Battery diagnosis |
| Portable booster jump | $0 after equipment | 5-10 minutes | Replacement battery |
| Battery recharge | $20-$80 | 4-12 hours | Failed battery |
| Battery replacement | $100-$300 | 30-90 minutes | Programming on some vehicles |
| Roadside jump service | $50-$150 | 30-90 minute wait | Parts and extended towing |
Prices vary by battery size, location, membership coverage, labor rates, and vehicle access. A roadside membership may include the jump-start, while an independent call usually charges for service even when the battery cannot be revived.
Can You Jump-Start a Hybrid or EV?
A hybrid or electric vehicle can often receive a jump-start through its separate 12-volt auxiliary battery, but a conventional jump-start does not recharge or start the high-voltage traction battery. Always follow the vehicle manual and use only the marked 12-volt terminals.
The 12-volt battery powers computers, relays, locks, displays, and the control systems that permit a hybrid vehicle to enter Ready mode. An EV may also need its 12-volt system before the high-voltage battery can operate the vehicle.
Never connect jumper cables to orange high-voltage wiring, traction-battery terminals, or unidentified electrical components. Do not use another vehicle to charge the high-voltage battery. If the 12-volt battery is inaccessible or the car remains inoperative, call a technician familiar with that model.
What Changes in Cold, Rain, or Tight Spaces?
Cold weather reduces battery output, rain increases slip and visibility risks, and tight parking spaces may prevent safe cable placement. In each situation, the correct response is to improve access or call for help rather than improvise a dangerous connection.
In freezing weather, remove ice from the battery case and terminals, but do not jump a battery that is visibly frozen or cracked. A frozen lead-acid battery can rupture when current enters it. Warming the vehicle naturally or using roadside assistance is safer than applying an open flame or high external heat.
In rain, keep the battery tops and cable clamps as dry as practical. Water does not normally prevent a 12-volt jump, but standing water, lightning, poor visibility, and traffic can make the location unsafe.
In a parking garage, keep the donor vehicle outside the disabled vehicle’s path and ensure ventilation. Never run a gasoline engine in a closed garage. A portable booster is often more practical when vehicle noses cannot align.
Why Won’t the Car Start?
A failed jump-start usually indicates poor clamp contact, an exhausted or damaged battery, an unsuitable power source, or a fault unrelated to the battery. The sound and electrical behavior provide useful clues, but repeated attempts should stop when the diagnosis is uncertain.
| Symptom after connection | Likely cause | Safe next action |
|---|---|---|
| Rapid clicking | Low voltage or poor clamp contact | Refit clamps on clean metal |
| One heavy click | Starter, cable, or severe battery fault | Stop repeated cranking; test starter circuit |
| No lights or sound | Loose terminal, zero charge, fuse fault | Inspect terminals and call for diagnosis |
| Engine turns normally but will not run | Fuel, ignition, immobilizer, or sensor issue | Stop jumping and troubleshoot engine systems |
| Donor stalls | Short circuit or incorrect connection | Switch off, disconnect, seek professional help |
| Starts, then dies | Alternator or charging-system failure | Avoid driving far; arrange repair |
Corroded terminals can block current even when the battery itself is serviceable. Turn both vehicles off, remove the cables in reverse order, and clean only accessible corrosion with appropriate eye protection; do not scrape aggressively around a battery-current sensor.
A rapid clicking sound does not prove that thicker cables or higher engine speed will solve the problem. If a correctly connected, adequately charged donor cannot start the vehicle after three or four short attempts, the starter, ground strap, battery, or charging system needs testing.
What Should You Do After the Engine Starts?
After a successful jump-start, keep the engine running, avoid unnecessary electrical loads, and have the battery and alternator tested as soon as practical. The next restart is uncertain until testing confirms that the battery accepted and retained charge.
A typical resting-voltage check requires switching the engine off and waiting several hours without a charger or recent drive. About 12.6 volts suggests a fully charged conventional battery, about 12.4 volts indicates partial charge, and readings near 12.0 volts indicate substantial discharge. These values are screening figures, not a complete health test.
With the engine running, many conventional vehicles show approximately 13.7-14.7 volts at the battery, but smart charging systems can vary outside that range depending on temperature, load, and battery state. The vehicle manual or a professional charging-system test should determine whether the result is acceptable.
Replace or investigate the battery when it is older than its typical 3-5 year service life, repeatedly needs jumps, has a failed load test, or loses charge overnight. Investigate the alternator when the battery warning lamp remains illuminated, headlights dim while driving, or the engine dies soon after the jump.
What Alternatives Can Start the Vehicle?
Roadside assistance, a battery charger, and a manual-transmission push start are alternatives, but each solves a different problem. A charger restores energy slowly, roadside service adds diagnosis, and a rolling start works only for some manual vehicles with a functional electrical system.
A manual car may be bump-started by switching the ignition on, selecting second gear, pressing the clutch, gaining controlled rolling speed, and releasing the clutch briefly. Use this only where traffic, terrain, and the vehicle manual permit it. Do not push-start an automatic transmission, and avoid the method when the battery cannot power the fuel pump, electronic controls, or immobilizer.
A battery maintainer is better for vehicles that sit unused. It prevents repeated deep discharges and reduces the chance of needing emergency assistance. A jump-start is a recovery method, not routine battery maintenance.
Common Mistakes and How to Fix Them
- Reversing polarity: Disconnect immediately if a clamp is placed incorrectly. Do not continue to test the vehicle, because fuses, control modules, and batteries can be damaged.
- Using a frozen or swollen battery: Stop before connecting power. Arrange inspection or replacement instead.
- Connecting to painted metal: Move the final black clamp to a clean, solid engine or chassis ground.
- Letting clamps touch: Switch off the donor, separate the clamps safely, and inspect for melted insulation before trying again.
- Running the donor at high speed: Return it to idle unless the manufacturer specifically instructs otherwise.
- Driving indefinitely after a jump: Arrange a battery and alternator test, because a drive cannot repair an internally shorted battery or failed alternator.
The counterintuitive failure is a vehicle that starts easily with cables but fails again ten minutes later. That pattern often points to a battery that cannot retain charge or an alternator that is not producing sufficient output, not a jump-start technique problem.
Frequently Asked Questions
How long should a car run after a jump-start?
Drive for at least 20-30 minutes if the vehicle is operating normally, but do not treat that period as a guaranteed recharge. A deeply discharged battery may need several hours on a charger, and a failed battery will not recover through driving. Avoid shutting down until you reach a safe location or repair facility.
Can jumper cables damage a car?
Jumper cables can damage a vehicle when polarity is reversed, clamps short together, or the connection ignores designated jump posts. Correct 12-volt connections normally do not harm a compatible vehicle. Modern cars contain sensitive modules, so the owner’s manual should control terminal selection and any special procedure.
Can you jump-start a car without another car?
Yes. A charged 12-volt lithium jump starter can start many cars without a donor vehicle. The booster must have sufficient current capacity, correct polarity protection, and enough charge. A battery charger can restore a battery but usually cannot provide immediate starter current unless it has a dedicated engine-start mode.
Why does my car need a jump every morning?
A car that needs a jump every morning has a battery, alternator, parasitic-drain, or terminal problem. Battery age above 3-5 years increases suspicion, while a battery warning lamp or voltage below approximately 13.7 volts during charging points toward the alternator. Testing should occur before buying another battery.
Is it safe to jump-start a car in the rain?
A 12-volt jump-start can be performed in light rain when the terminals are accessible and the operator is away from standing water, lightning, and traffic. Keep clamps from touching, avoid flooded ground, and use roadside assistance when visibility or weather makes the location unsafe.
The Bottom Line
To jumpstart a car safely, use a compatible 12-volt source, inspect the battery, connect red to positive first, place the final black clamp on the disabled vehicle’s approved ground, and crank for no more than five seconds per attempt. Keep the restarted vehicle running, then test the battery and charging system promptly because a jump-start restores mobility, not battery health.