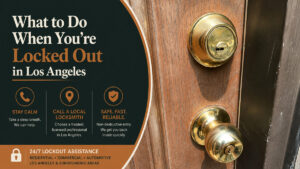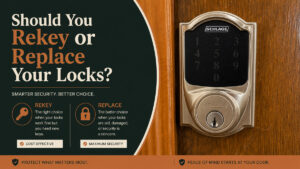
Lock picking is the manipulation of a lock’s internal components without its operating key. For lawful training, practice only on a lock you own or a transparent cutaway cylinder, while real lockouts should go to a locksmith, landlord, manufacturer, or authorized key service because improvised entry can cause damage and create legal problems.
Key facts
A pin-tumbler lock opens when the pin interfaces align at the shear line, allowing the plug to rotate inside its housing.
A practice kit normally contains one tension tool, one hook, and one rake, although a transparent or cutaway lock is the safest starting point.
Raking is faster to understand, while single-pin manipulation provides more feedback but requires substantially more practice.
Bumping and other covert-entry methods can damage hardware, leave evidence, and violate laws or property rules.
A typical beginner spends 1-2 hours learning the mechanism and 10-20 hours developing consistent tactile control on training locks.
During a real lockout, key replacement, landlord assistance, roadside coverage, or a licensed locksmith is safer than attempting entry.
What Does Lock Picking Mean?
Lock picking is a non-destructive locksmithing and locksport skill that uses controlled manipulation to imitate the alignment created by a correct key. The practice concerns mechanical understanding, fine motor control, and security evaluation, but permission remains a prerequisite because ownership of a lock-pick set does not establish authorization to open a lock.
The term covers several activities. A hobbyist may study a cutaway cylinder, a locksmith may inspect a customer’s lock under a service agreement, and a security professional may evaluate an installed cylinder under written authorization. Those settings differ from opening a locked door, vehicle, mailbox, safe, or storage unit without documented permission.
The safest learning boundary is simple: use a dedicated training lock that is disconnected from a door or padlock hasp. A clear acrylic model helps beginners see pin movement, while a brass cutaway or progressively pinned cylinder provides more realistic sound and touch. Neither type should be treated as a license to test neighboring, public, or occupied property.
How Does a Pin-Tumbler Lock Work?
A pin-tumbler lock opens when the gaps between key pins and driver pins align with the shear line between the plug and its surrounding housing. The key’s cuts create that alignment simultaneously across the cylinder, whereas a practice exercise demonstrates the same mechanical relationship one chamber at a time.
A typical cylinder contains these parts:
- Plug: The rotating inner core that carries the keyway.
- Housing: The stationary outer body, sometimes called the hull or Bible.
- Shear line: The circular boundary that must remain clear for rotation.
- Chambers: Vertical passages containing pin stacks.
- Key pins: Lower pins that contact the key.
- Driver pins: Upper pins that sit between key pins and springs.
- Springs: Components that push each pin stack toward the plug.
- Sidebar or security elements: Additional components found in some higher-security cylinders.
With no key inserted, driver pins cross the shear line and prevent the plug from turning. A correctly cut key lifts each key pin to a precise height, causing the key-pin and driver-pin interface to sit at the boundary. Manufacturing tolerances create small differences in how chambers bind during controlled training exercises, which is why tactile feedback exists.
A transparent lock reveals alignment visually, but it can teach an incomplete lesson because real metal cylinders produce different friction, sound, and tolerances. Progressive brass locks are more useful after the mechanism is understood.
Which Tools Belong in a Practice Kit?
A lawful beginner’s practice kit needs a training cylinder, a holder, a tension tool, and a small selection of picks. The cylinder matters more than the number of tools because an unmounted lock encourages awkward handling and a large pick set can obscure the basic relationship between tension, pin movement, and plug rotation.
| Training item | Typical quantity | Typical price | Primary purpose |
|---|---|---|---|
| Clear acrylic cylinder | 1 | $10-$20 | Visual study of pin stacks |
| Brass cutaway cylinder | 1 | $25-$60 | Tactile and visual training |
| Progressive pinning lock | 1 | $35-$80 | Controlled increase from 2 to 6 pins |
| Basic hook and rake set | 1 set | $15-$40 | Comparing training profiles |
| Flat tension tools | 2-4 | Included or $5-$15 | Studying plug tension in a practice lock |
| Lock holder or vise | 1 | $15-$45 | Stable, repeatable positioning |
A hook is shaped for controlled contact with an individual pin in a training cylinder. A rake has multiple peaks or ridges and demonstrates how several pins can move together. A bottom-of-keyway, or BOK, tension tool occupies the lower portion of the keyway; a top-of-keyway, or TOK, tool occupies the upper portion.
Beginners should avoid improvised items such as hairpins, paper clips, knives, or screwdrivers. Those objects have inconsistent dimensions, can snap inside a cylinder, and may deform the plug or keyway. A damaged practice lock teaches bad feedback and costs more to replace.
How Should You Practice Safely?
Practice on a disconnected, owned training lock for 15-20 minutes at a time, beginning with a two-pin or cutaway cylinder and recording what each component does. The goal is not speed; the goal is recognizing the difference between free movement, binding, an overset condition, and a correctly aligned training state.
Before You Start
| Requirement | Typical value | Safe checkpoint |
|---|---|---|
| Ownership or written permission | 100% required | Lock is yours or authorization is documented |
| Training session | 15-20 minutes | Stop when feedback becomes confusing |
| Practice lock | 1 disconnected cylinder | No installed door or vehicle lock |
| Starter tools | 1 hook, 1 rake, 2 tension tools | Tools fit without force |
| Workspace | 30-60 cm clear area | Small parts cannot fall into a drain |
| Budget | $30-$100 | Includes a usable training lock |
Mount the lock in a holder or place it on a stable surface. Keep the key, pinning chart, and manufacturer instructions nearby. If a tool catches, bends, or becomes stuck, stop rather than twisting harder.
Step 1: Identify the Mechanism
Confirm that the training unit is a pin-tumbler cylinder and identify the visible chambers, springs, plug, and shear line. Do not begin with an installed residential, commercial, vehicle, mailbox, safe, or restricted key system, because the same manipulation can bypass property controls.
You will know the setup is suitable when the cylinder is separate from any locking hardware and the manufacturer identifies it as a practice or cutaway model. The common mistake is assuming that a clear lock represents every lock; wafer, disc-detainer, lever, magnetic, and electronic mechanisms behave differently.
Step 2: Observe the Keyed State
Insert the supplied key into the training lock and observe the pin positions through the cutaway window or instructional diagram. Compare the locked position with the rotated position, noting that the key creates a coordinated alignment rather than moving every pin to an identical height.
The checkpoint is a clear visual difference between the locked and unlocked states. The common mistake is treating the shear line as a visible slot that must be pushed open; in a real cylinder, it is a boundary created by the geometry of the plug and housing.
Step 3: Use the Manufacturer’s Training Exercise
Follow the practice lock’s printed exercise, which may specify a two-pin setup, marked chambers, or removable pin stacks. Keep the cylinder on the bench and use only the supplied learning sequence, rather than transferring the exercise to a door, padlock, cabinet, or vehicle.
The checkpoint is repeatable movement in the training model without force or damage. The common mistake is increasing pressure when feedback disappears. In mechanical training, more force usually masks information and increases the chance of bending a pick or deforming a pin.
Step 4: Record Feedback
Write down whether each chamber feels free, springy, resistant, or stuck, and compare those observations with the cutaway view or instructor demonstration. A log with date, lock configuration, tool profile, and outcome turns vague hand movement into a measurable practice routine.
The checkpoint is identifying the same condition twice in succession on the same training configuration. The common mistake is chasing a click as proof of success. A sound can indicate movement without proving that the plug has reached an open state.
Step 5: Reset and Inspect
Return the training lock to its original state using the supplied key or reset procedure, then inspect the keyway, picks, pins, and retaining components for damage. Resetting after every short exercise prevents a learner from confusing a partially rotated plug or altered pin stack with a repeatable result.
The checkpoint is a fully functioning training lock with no bent tools, loose hardware, or displaced springs. The common mistake is continuing after a component feels abnormal. Stop, document the condition, and consult the manufacturer or a locksmithing instructor.
How Do Training Methods Compare?
Raking offers quick visual feedback in a low-complexity practice lock, while single-pin study offers finer mechanical understanding and a more demanding learning curve. Bumping is not an appropriate beginner exercise because it uses impact, can damage cylinders, and may be unlawful even when a learner owns similar equipment.
| Method | Training value | Typical learning time | Main limitation | Appropriate setting |
|---|---|---|---|---|
| Cutaway observation | High for mechanism | 30-60 minutes | Limited realism | Bench training |
| Rake demonstration | Moderate | 1-2 hours | Poor diagnostic detail | Owned practice cylinder |
| Single-pin study | High | 10-20 hours | Slow feedback | Progressive practice lock |
| Bumping demonstration | Low for beginners | 30-60 minutes | Impact and legal risk | Qualified instructor only |
| Locksmith inspection | High for diagnosis | 15-60 minutes | Service cost | Authorized real-world work |
Raking does not reliably defeat modern high-security cylinders, and a successful training result does not predict performance against a particular installed lock. Security pins, sidebar systems, restricted keyways, tight manufacturing tolerances, and damaged hardware change the behavior substantially.
A useful practitioner rule is to treat speed as a poor first metric. Consistent identification of a training state is more valuable than a single fast opening, because speed can result from an accidental alignment that cannot be reproduced.
Why Do Pins Overset or Enter a False Set?
Pins overset when a training exercise moves a key pin above the intended alignment range, while a false set occurs when a security pin creates partial plug movement without completing the correct alignment. Both conditions produce misleading feedback and become more likely when a learner uses excessive force or focuses only on sound.
| Symptom in a practice lock | Likely cause | Safe response |
|---|---|---|
| Plug movement stops suddenly | Pin overset or excess tension | Release the exercise and reset with the supplied key |
| One chamber feels immovable | Misalignment or tool contact | Withdraw, inspect, and reduce force |
| Partial rotation with no completion | Security-pin false set | Stop and consult the training diagram |
| Pick bends at the tip | Excessive pressure or poor fit | Replace or straighten only per manufacturer guidance |
| Spring disappears from view | Displaced component | Disassemble only with the maker’s instructions |
| Key no longer returns smoothly | Damaged or shifted pin stack | Stop using the cylinder |
A false set is not proof that a real lock is nearly open. In training, it is a lesson about counter-rotation, spool geometry, and the difference between partial movement and complete alignment. The safest recovery is to reset the cylinder rather than applying more pressure to a stuck component.
The most common beginner error is treating tension as a binary control. In reality, the training variable is a relationship between tool contact, plug position, pin friction, and cylinder tolerances. That relationship should be studied on a bench, not discovered during an urgent lockout.
Which Lock Types Behave Differently?
Pin-tumbler cylinders use spring-loaded pin stacks, but other locks use wafers, discs, levers, magnets, or electronic authorization. A training method designed for one mechanism should not be applied to another, and visual similarity between a keyway and a household lock does not establish compatibility or permission.
| Lock type | Primary internal element | Common applications | Beginner training suitability |
|---|---|---|---|
| Pin tumbler | Key pins and driver pins | Deadbolts, padlocks, cylinders | High with a cutaway |
| Wafer tumbler | Flat spring-loaded wafers | Cabinets, vehicles, low-cost cylinders | Moderate with a dedicated trainer |
| Disc-detainer | Rotating discs and gates | Abloy-style high-security locks | Low without specialist instruction |
| Lever lock | Levers and bolt mechanism | Older doors, furniture, safes | Low |
| Tubular lock | Radial pin arrangement | Vending equipment, some devices | Low |
| Electronic lock | Motor, solenoid, or controller | Smart locks, access systems | Not a mechanical picking exercise |
A locksmith should diagnose the lock type before selecting a non-destructive service method. For electronic locks, battery condition, credential failure, firmware behavior, and override procedures may matter more than the cylinder. For safes, vehicles, and restricted commercial systems, specialist tools and authorization are particularly important.
Can You Pick a Lock You Own?
You may be permitted to study or service a lock you own, but local law, lease terms, workplace rules, and manufacturer restrictions can still affect what is lawful. Ownership of a building does not automatically authorize bypassing a tenant’s private lock, and possession of a lock does not prove consent to open it.
For defensible practice, retain a receipt, photograph the disconnected training lock, and keep written authorization for workplace or client evaluations. Locksmith licensing and tool restrictions vary by jurisdiction, so consult the relevant state, provincial, or national authority before purchasing or carrying specialized entry equipment.
The safe rule is narrower than “if I own it, I can open it.” Use training hardware for learning, use ordinary keys or authorized credentials for access, and use a licensed professional when the lock is installed or someone else’s property is involved.
What Is the Safest Lockout Alternative?
The safest lockout alternative is the least destructive authorized route: use a spare key, contact the property manager, call roadside assistance, request a manufacturer-supported recovery method, or hire a licensed locksmith. A typical residential locksmith visit costs about $75-$200 during ordinary hours and $150-$400 after hours, with location and lock complexity affecting the quote.
| Situation | First contact | Typical cost range | Typical response time |
|---|---|---|---|
| Rental apartment | Landlord or property manager | $0-$150 | 15-120 minutes |
| Residential door | Licensed locksmith | $75-$400 | 20-90 minutes |
| Vehicle lockout | Roadside assistance | $0-$150 | 20-90 minutes |
| Lost ordinary key | Key-cutting service | $5-$40 | 5-30 minutes |
| Restricted key system | Authorized dealer or locksmith | $30-$250 | 1 hour to several days |
| Child, vulnerable person, or hazard inside | Emergency services | Varies by jurisdiction | Immediate dispatch |
Ask for the total price before work begins, including the service call, labor, replacement cylinder, and after-hours surcharge. Verify identification, licensing where applicable, and proof of occupancy or ownership.
Do not insert improvised objects, drill a cylinder, force a door, or attempt a covert-entry technique during an emergency. Those actions can turn a simple lockout into a damaged frame, broken keyway, rekeying bill, or police response.
How Much Time and Money Does Practice Require?
A realistic beginner budget is $30-$100 for a cutaway or progressive training lock and a small tool set, while consistent tactile proficiency commonly requires 10-20 hours of structured practice. Advanced security-cylinder study can cost $100-$250 or more and may require months of supervised work.
| Learner profile | Equipment budget | Practice schedule | Suitable milestone |
|---|---|---|---|
| Curious beginner | $30-$60 | 2 sessions of 15 minutes weekly | Identify pin movement visually |
| Locksport learner | $60-$150 | 3-4 sessions of 20 minutes weekly | Repeat a training exercise |
| Locksmith apprentice | $150-$400 | 30-60 minutes under supervision | Diagnose several cylinder types |
| Homeowner improving security | $0-$200 | One security assessment | Replace vulnerable hardware |
| Professional evaluator | $250+ | Documented authorized testing | Report repeatable findings |
A clear acrylic lock is inexpensive and useful for anatomy, but it often provides unrealistic tactile feedback. A brass progressive lock costs more and offers less visual convenience, yet it better represents friction, sound, and tool interaction.
How Can You Reduce Picking Risk?
Homeowners reduce picking risk by choosing a properly installed cylinder with security features, protecting the strike area, controlling key duplication, and combining mechanical hardware with sensible access management. No cylinder eliminates every entry method, because attackers may target doors, frames, hinges, credentials, or occupants instead.
Ask a locksmith or manufacturer about:
- Security pins such as spools or serrated drivers.
- Restricted or patent-protected keyways.
- Grade-rated deadbolts appropriate to the door.
- Reinforced strike plates with adequately long screws.
- Cylinder guards where the hardware is exposed.
- Rekeying after tenant, employee, or contractor turnover.
- Smart-lock battery backup and mechanical override behavior.
- Audit logs and credential revocation for access-controlled premises.
Picking resistance is only one security attribute. A high-security cylinder mounted in a weak door frame can provide less practical protection than a standard cylinder installed with a reinforced strike and correct fasteners.
What Are the Limits of Lock-Picking Guides?
A written guide cannot safely substitute for supervised practice, a manufacturer’s instructions, or a locksmith’s diagnosis. Lock models differ in pin count, tolerances, security features, keyway shape, retaining hardware, and condition, so a generic sequence may fail or damage the mechanism.
This guide also does not provide instructions for opening an installed lock, bypassing a vehicle, defeating a safe, manipulating a mailbox, or using bump keys. Those applications involve higher property, privacy, and personal-safety risks, and they require documented authorization and appropriate professional training.
For locksport, use a club or instructor that requires members to bring their own locks and observe consent rules. TOOOL, the Open Organisation of Lockpickers, publishes educational material for the locksport community, but local laws and event rules still control participation.
Frequently Asked Questions
Is lock picking illegal?
Lock picking is not automatically illegal in every jurisdiction, but unauthorized entry, possession of specialized tools with criminal intent, trespass, and interference with property can be illegal. Rules differ by country, state, and circumstance. Practice only on owned training locks, and obtain written permission for workplace, client, or research testing.
Can a paper clip open a lock?
A paper clip is an unreliable substitute for a purpose-made training tool and can scratch the keyway, break inside the cylinder, or bend without providing useful feedback. Paper clips should not be used on installed locks. A low-cost cutaway cylinder and properly sized practice tools are safer and more informative.
Are clear acrylic locks useful?
Clear acrylic locks are useful for learning the names and visible movement of plugs, chambers, pins, and springs during the first 30-60 minutes of study. Acrylic models do not reproduce the friction and sound of a brass cylinder accurately, so progressive metal practice is a better next step.
Do security pins make a lock pick-proof?
Security pins make manipulation more difficult, but they do not make a lock pick-proof. Spool, serrated, and mushroom pins can create false sets and counter-rotation, while restricted keyways and additional components raise the skill requirement. Overall door construction and installation remain equally important.
How do I open a locked interior door without damage?
Use the manufacturer’s privacy-function release, the supplied emergency key, a building manager, or a locksmith, depending on the lock and your authorization. Avoid forcing the knob, drilling, or inserting improvised objects. If a child, vulnerable person, fire, or medical danger is involved, call emergency services.
What should I buy first for lawful practice?
Buy one disconnected clear or cutaway training lock, one hook, one rake, and two compatible tension tools for approximately $30-$60. Add a progressive brass cylinder after understanding the mechanism. Do not begin with a large kit, a vehicle lock, a safe, or any lock installed on someone’s property.
The Bottom Line
How to pick a lock is best approached as a lawful mechanical-training question, not as an emergency entry shortcut. Study a disconnected cutaway or progressive cylinder, follow its manufacturer’s exercise, document feedback, and stop when a component binds or becomes damaged. For any real lockout, choose a spare key, authorized property contact, roadside service, key replacement, or licensed locksmith.