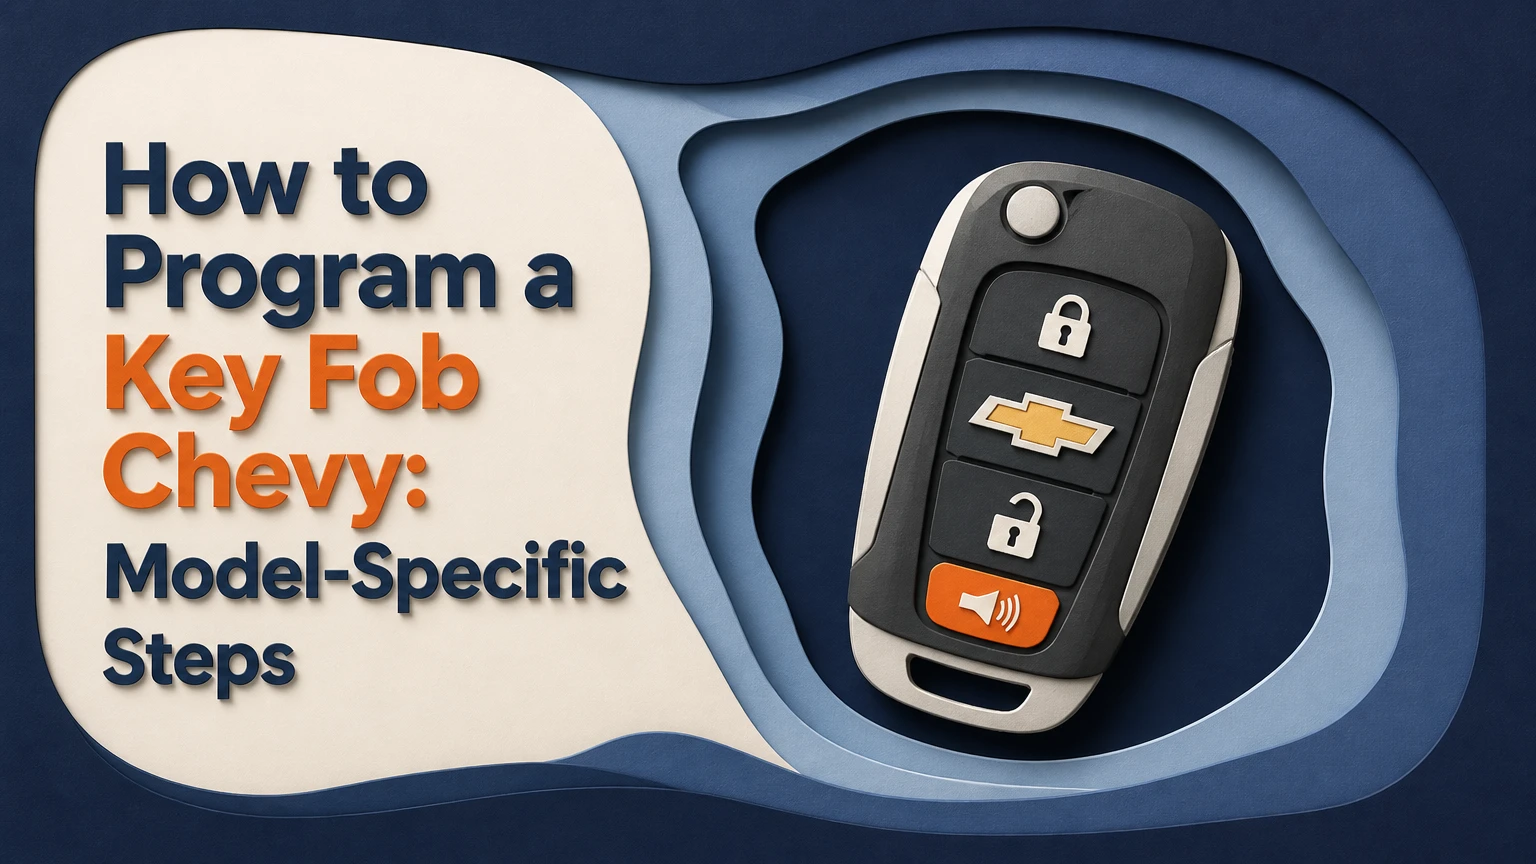
To program a Chevrolet key fob, first identify whether the vehicle uses a turn-key ignition, a push-button smart key, or diagnostic-only security programming. Supported older Chevrolet models may learn a remote through an ignition-and-door-lock sequence, while many newer vehicles require a recognized fob, a transmitter pocket, or a locksmith-grade scan tool.
Key Facts
Chevrolet remote programming procedures vary by model, year, trim, and entry-system architecture.
A replacement fob must match the vehicle’s transmitter part number, FCC ID or equivalent identifier, frequency, button layout, and immobilizer compatibility.
Pairing lock and unlock buttons does not always program the transponder that allows the engine to start.
Adding a remote can erase previously learned transmitters on some Chevrolet vehicles, so gather every working fob before entering learning mode.
A shell replacement usually needs no programming if the original circuit board and transponder remain intact.
Typical DIY pairing takes 2-10 minutes when the vehicle supports owner programming; diagnostic programming commonly takes 15-45 minutes.
What Does Chevrolet Key-Fob Programming Actually Do?
Chevrolet key-fob programming registers a transmitter with the vehicle’s body control module, or BCM, so the vehicle accepts commands such as lock, unlock, panic, liftgate release, and remote start. Smart-key systems add a separate security relationship between the fob, passive-entry antennas, and the immobilizer system that authorizes engine operation.
A remote can therefore appear to work while the vehicle still refuses to start. The lock buttons use radio communication, whereas engine authorization may depend on a programmed transponder, a proximity challenge, or both. Chevrolet owner manuals typically distinguish “remote keyless entry” functions from theft-deterrent and starting functions for this reason.
Most Chevrolet transmitters use a small circuit board, radio antenna, button contacts, and a coin-cell battery. Common cells include CR2032 and CR2450, but the correct battery depends on the transmitter housing. Frequency alone does not establish compatibility.
Remote pairing versus immobilizer programming
Remote pairing controls vehicle access functions. Immobilizer programming authorizes a coded key or smart fob to start the vehicle. A replacement blade can be cut correctly and still require transponder registration, while a remote can lock the doors without being accepted as a starting key.
That distinction determines the correct service. A simple remote-learning sequence may be adequate for a second transmitter on an older vehicle, but an all-keys-lost situation usually requires security access through a GM-capable diagnostic tool.
Which Chevrolet Key Fob Do You Have?
The physical design provides a useful starting point, but it does not prove which programming method applies. Compare the fob with the vehicle’s owner manual and the original transmitter label before purchasing a replacement.
| Fob type | Identifying feature | Common battery examples | Programming concern |
|---|---|---|---|
| Separate remote | Plastic transmitter plus metal ignition key | CR2032 | Remote learning may be owner-supported |
| Flip or switchblade key | Blade folds into transmitter body | CR2032 | Blade cutting and remote pairing are separate |
| Integrated transponder key | Metal blade and coded head in one assembly | CR2032 | Engine authorization may require security programming |
| Passive-entry smart fob | Push-button start and no normal ignition slot | CR2450 or CR2032 | Vehicle may require a pocket sequence or scan tool |
| Remote-start transmitter | Dedicated remote-start button or extended range | CR2032 | Remote-start option must exist in the BCM configuration |
A 2000s Chevrolet Impala, Tahoe, Suburban, Silverado, or TrailBlazer may use an owner-learnable remote, but exact procedures differ. A later Silverado, Equinox, Traverse, Bolt, Trax, or Tahoe may use a smart fob or require diagnostic access, depending on generation and trim.
How Do You Choose the Correct Replacement Fob?
Choose the replacement by matching the original transmitter’s part number, FCC ID, frequency, button arrangement, blade style, and vehicle application. The most reliable method is to read the label or circuit-board identifier on the original fob and verify the replacement against a GM parts catalog or a reputable automotive locksmith.
Use this checklist before ordering:
- Record the Chevrolet model, model year, trim, and body style.
- Photograph the front and back of the original transmitter.
- Write down every number on the housing and circuit board.
- Match the number of buttons and the remote-start symbol.
- Confirm whether the vehicle has passive entry or push-button start.
- Confirm whether the replacement includes a transponder and an uncut blade.
- Verify return terms, because some sellers exclude programmed or opened electronics.
An aftermarket shell may fit cosmetically while containing an incompatible circuit board. A fob with the wrong frequency or security generation cannot be made compatible by installing a new battery.
| Compatibility item | Where to find it | Consequence of mismatch | Verification method |
|---|---|---|---|
| GM part number | Housing label or catalog | Remote may not learn | GM parts catalog |
| FCC ID or regional identifier | Back label or circuit board | Radio signal may be rejected | Original-fob comparison |
| Frequency | Label or manufacturer data | No communication with receiver | Vehicle-specific listing |
| Button layout | Front membrane | Missing functions | Compare every symbol |
| Blade profile | Metal key edge | Key will not turn lock | Locksmith duplication check |
| Transponder type | Key head or smart-fob data | Engine will not start | GM-capable diagnostic test |
Can You Program a Turn-Key Chevrolet Fob Yourself?
Many older turn-key Chevrolet vehicles support an onboard remote-learning sequence, but the sequence is not universal across all models. A commonly published procedure uses the driver’s power-lock switch and two ignition cycles, although the owner manual remains the controlling source because some vehicles use a different sequence or do not support self-programming.
Before you start
| Requirement | Typical value |
|---|---|
| Time | 2-10 minutes |
| Difficulty | Low, if owner programming is supported |
| Vehicle condition | Battery above 12.2 volts |
| Materials | Correct fob, working vehicle key, fresh coin cell |
| Key inventory | Every working remote present |
| Location | Inside vehicle with doors fully closed |
Step 1: Prepare the vehicle
Sit in the driver’s seat, close every door, and switch off lights and accessories. Use the driver’s power-lock control to lock the doors, then insert the ignition key without starting the engine.
Success checkpoint: The key is in the ignition, the doors are closed, and the instrument cluster is off.
Common mistake: Leaving a door, liftgate, or hood ajar can prevent the BCM from entering learning mode on some models.
Step 2: Enter the ignition sequence
Press and hold the driver’s door Unlock button. While holding it, turn the ignition from Off to Run and back to Off twice, using the pattern Run-Off-Run-Off. Do not crank the engine.
Release the Unlock button after completing the sequence. On vehicles that support this method, the door locks cycle to confirm learning mode.
Success checkpoint: The locks cycle automatically after the button is released.
Common mistake: Turning the key to Start, or pausing too long between positions, cancels the sequence.
Step 3: Pair each remote
Press and hold the Lock and Unlock buttons on the first remote at the same time. Hold both buttons for about 10-15 seconds, or until the door locks cycle again. Repeat the same action for every remote you want the vehicle to remember.
Success checkpoint: The locks cycle after each accepted transmitter.
Common mistake: Pressing one button slightly before the other can fail to trigger the learning command.
Step 4: Exit learning mode
Turn the ignition to Run, then switch it off and remove the key. Test lock, unlock, panic, trunk or liftgate release, and remote start if equipped.
Success checkpoint: Every intended button produces the expected vehicle response.
Common mistake: Ending the sequence without the required ignition position can leave the vehicle in learning mode or fail to store the transmitter.
Some Chevrolet models erase previously learned remotes when a new learning session begins. Program all available remotes during the same session.
Can You Add a Smart Fob Without a Scan Tool?
Some push-button Chevrolet vehicles permit owner programming when one recognized smart fob is available, but the exact procedure and transmitter-pocket location vary. Common locations include the center-console storage area, cupholder, glovebox, or a marked pocket identified in the owner manual.
A commonly used sequence on supported vehicles begins by unlocking the driver’s door with the emergency blade several times, then placing the new fob in the designated pocket. The Driver Information Center may display a message such as “Ready for Remote,” after which the Start/Stop button registers the transmitter.
Step 1: Keep the working smart fob inside
Place the recognized fob in the location specified by the vehicle manual. Remove the mechanical blade from the replacement fob if the procedure requires using that blade in the driver-door cylinder.
Step 2: Activate the vehicle’s learn prompt
Use the emergency blade in the driver-door lock cylinder only when the manual specifies that action. Some Chevrolet procedures call for repeated unlock turns within a short time window, while other systems use dashboard menus or a diagnostic tool.
Step 3: Place the new fob in the transmitter pocket
Position the unprogrammed fob with the buttons oriented as directed. The pocket contains a backup antenna that can read a weak or unrecognized smart transmitter even when normal passive detection fails.
Step 4: Register and test the fob
Press the Start/Stop button exactly as the manual directs. Do not press the brake unless the procedure requires it. Wait for the dashboard confirmation, exit programming mode, and test both passive entry and engine starting.
Important limitation: A generic online sequence cannot safely substitute for the Chevrolet owner manual. A wrong attempt may consume a learning slot, erase existing fobs, or produce no result without indicating why.
When Is Diagnostic Programming Required?
Diagnostic programming is usually required when the Chevrolet model does not support owner learning, when all keys are lost, when a smart fob must be added without a recognized key, or when the immobilizer and BCM require security access. A GM-capable scan tool, automotive locksmith device, or Chevrolet dealer tool may be necessary.
A generic OBD2 code reader cannot normally program a key fob. OBD2 describes the connector and communication standards used for vehicle diagnostics, not universal access to theft-deterrent functions. Security programming may require a timed authorization process, vehicle-specific software, and proof of ownership.
The technician may need to:
- Identify the BCM and theft-deterrent system.
- Establish security access through the scan tool.
- Erase missing keys when appropriate.
- Add every available transmitter in one session.
- Program the transponder or smart-key identity.
- Verify that the vehicle starts and that passive functions operate.
Do not disconnect the tool during a security procedure. A low vehicle battery or interrupted diagnostic session can create additional faults and increase recovery cost.
Which Chevrolet Model and Year Variations Matter?
Model year is a useful clue, not a definitive programming rule. Chevrolet changed system architecture during production runs, and the same model name can use different fobs across trim levels and generations.
| Chevrolet example | System variation to check | Likely DIY situation | Professional trigger |
|---|---|---|---|
| Silverado 1999-2006 | Separate remote and ignition key | Many support onboard learning | Wrong transmitter or lost key |
| Silverado 2007-2013 | Remote or integrated key by trim | Procedure varies by equipment | Immobilizer or no valid key |
| Impala 2000-2013 | Separate remote or flip key | Some support manual learning | Remote does not enter learn mode |
| Equinox 2010-2017 | Remote or smart key by trim | Manual method is not consistent | Push-button or all-keys-lost case |
| Trax 2015-2022 | Flip key or smart transmitter | Follow exact model manual | New smart key without recognized key |
| Bolt EV 2017-2023 | Smart transmitter architecture | Pocket procedure may apply | Immobilizer registration failure |
| Tahoe 2015-2024 | Smart key by trim and year | Limited owner programming | Most replacement-key cases |
The table indicates patterns, not guarantees. Confirm the exact owner-manual procedure for the VIN or consult a locksmith before buying a fob based only on the vehicle’s year.
What Does Chevrolet Key-Fob Programming Cost?
Typical Chevrolet key-fob costs range from $2-$6 for a coin-cell battery to $150-$600 for a newer OEM smart fob with cutting and programming. A replacement remote purchased online may cost $15-$60, while mobile locksmith programming commonly adds $50-$150 depending on location, key type, and whether the vehicle still has a working key.
| Service scenario | Typical parts cost | Typical labor or service cost | Typical total time |
|---|---|---|---|
| Battery replacement | $2-$6 | $0-$20 | 5-10 minutes |
| Empty shell transfer | $8-$25 | $0-$50 | 10-30 minutes |
| Aftermarket remote, manual learning | $15-$60 | $0 | 5-15 minutes |
| Locksmith, existing working key | $40-$150 | $50-$150 | 15-45 minutes |
| Dealer, replacement smart fob | $80-$400 | $75-$200 | 30-90 minutes |
| All keys lost | $100-$450 | $100-$300 | 1-3 hours |
Location, vehicle security generation, emergency service timing, and key availability change the final price. Ask whether the quote includes the fob, blade cutting, programming, security access, travel, tax, and deletion of lost keys.
Which Service Option Is Best?
A mobile automotive locksmith is usually the best value for a replacement smart key or an all-keys-lost situation, provided the locksmith supports the specific Chevrolet system. A dealer offers the strongest OEM parts and documentation path, while DIY programming is appropriate only when the vehicle explicitly supports it and the correct transmitter is already in hand.
| Option | Best use case | Typical price | Main limitation |
|---|---|---|---|
| DIY owner procedure | Older vehicle with working ignition key | $15-$60 | Only supported on selected systems |
| Mobile locksmith | Smart key, lost key, roadside service | $100-$450 | Equipment and aftermarket quality vary |
| Chevrolet dealer | OEM fob and complex security case | $175-$600 | Higher labor and diagnostic fees |
| Online fob seller | Known part number and manual programming | $15-$120 | Compatibility and return risk |
| Shell-only replacement | Broken housing with working electronics | $8-$25 | Does not repair a damaged circuit board |
Ask the locksmith for the exact fob brand, programming capability, total on-site price, and warranty before authorizing work. “OBD2 programming” alone is not a sufficient description of the service.
When Is Programming Not Needed?
Programming is not needed when the original circuit board, transponder, and buttons still work and only the plastic shell is damaged. Transfer the original electronics into a compatible replacement shell, preserving the circuit board orientation, rubber membrane, battery contacts, and immobilizer chip.
A shell swap is useful for cracked housings, worn buttons, broken key rings, or damaged blade mounts. It is not suitable for a fob that has water damage, intermittent buttons, a failed antenna, or a missing transponder.
Test the old fob before opening it. Photograph the board, keep every rubber button in its original position, and avoid touching exposed contacts with oily fingers. If the vehicle uses a separate transponder chip, do not discard or leave that chip in the old case.
Why Does the New Fob Fail to Program?
A Chevrolet fob commonly fails because the replacement is incompatible, the vehicle never entered learning mode, the battery voltage is low, or the vehicle requires diagnostic security access. Repeating the same sequence cannot fix a wrong FCC ID, incompatible part number, or unsupported programming architecture.
Use this recovery sequence:
- Stop after two failed attempts rather than repeatedly cycling the ignition.
- Install a fresh, correctly oriented battery in the replacement fob.
- Check the original fob’s identifiers against the replacement.
- Close every door, liftgate, trunk, and hood.
- Confirm the vehicle battery is charged and no BCM-related fuse is blown.
- Recheck the owner manual for the exact model and trim.
- Try every working remote during one authorized learning session.
- Call a Chevrolet-capable locksmith if the vehicle requires security access.
Why does the fob unlock the car but not start it?
A Chevrolet fob may unlock the doors but fail to start the engine because remote pairing and immobilizer authorization are separate functions. The remote transmitter can be registered while the transponder or smart-key identity remains unrecognized.
Hold the fob in the vehicle’s backup detection pocket and attempt starting according to the owner manual. If the vehicle still displays a “No Key Detected,” “Service Theft Deterrent,” or similar message, diagnostic testing is appropriate.
What if all Chevrolet keys are lost?
All-keys-lost Chevrolet situations generally require a mobile locksmith or dealer with vehicle-security programming capability. The technician may need the VIN, government-issued identification, registration or title, and access to the vehicle; some vehicles also require towing if the steering lock or mechanical key cannot be operated.
Ask the provider whether lost keys will be erased from the BCM. A replacement key that starts the vehicle does not automatically invalidate a missing old key unless the technician performs the appropriate erase or relearn function.
How Can You Prevent a Second Programming Problem?
Record the original fob number, keep one working key away from the vehicle during daily use, and replace coin-cell batteries before they become intermittent. Store the spare in a dry location, but test it every few months because an unused fob can still suffer battery leakage or contact corrosion.
Use the owner manual rather than a generic video when the vehicle has push-button start, passive entry, remote start, or a warning message. Chevrolet procedures can change within one model generation, and a video for a 2017 Trax may not apply to a 2017 Equinox or a different trim.
A practical rule from automotive locksmith work is simple: verify the electronics before paying for cutting. A correctly cut blade cannot compensate for a wrong transmitter, and a correctly paired remote cannot authorize an incompatible immobilizer.
Frequently Asked Questions
Does changing a Chevy key-fob battery erase programming?
Replacing the coin-cell battery normally does not erase the fob’s stored identity because the code is retained in nonvolatile electronics. Install the battery with the correct polarity, avoid bending the contacts, and test the remote. Reprogramming becomes relevant only if the fob was damaged, replaced, or lost synchronization.
Can I program a Chevy key fob with the car running?
Do not run the engine unless the Chevrolet owner manual specifically instructs that action. Most learning procedures use the ignition in Run without cranking, or use the Start/Stop button without pressing the brake. Starting the engine can cancel the learning state on systems expecting accessory or Run power.
How long does a Chevrolet key fob last?
A Chevrolet key fob commonly lasts 5-10 years, but battery life, button wear, water exposure, and circuit-board damage determine the actual service period. Coin-cell batteries often last 1-3 years depending on use and transmitter design. A worn shell does not necessarily mean the electronics need replacement.
Can a Chevrolet dealer program an aftermarket fob?
A Chevrolet dealer may refuse an aftermarket transmitter or may program only a part that meets its catalog requirements. A capable automotive locksmith may accept a verified aftermarket fob, but compatibility remains the owner’s risk. OEM programming does not make an incorrectly specified transmitter compatible.
How do I find the transmitter pocket in a Chevy?
The transmitter pocket is usually identified in the owner manual under “Remote Keyless Entry,” “Starting the Vehicle,” or “Remote Key.” Common locations include the center-console bin, cupholder, glovebox, or a marked storage recess. The exact position changes by model, year, trim, and smart-key design.
The Bottom Line
To program a key fob Chevy owners should first identify the vehicle’s exact model year, ignition type, fob identifiers, and number of working keys. Use the owner procedure only when the vehicle supports manual learning; use a Chevrolet-capable locksmith or dealer for smart keys, immobilizer registration, and all-keys-lost cases. That decision prevents the most expensive mistake: buying a fob that the vehicle can never accept.